A fuel surcharge is an extra fee charged by trucking companies (or third parties) to cover the fluctuating cost of fuel. In the example below, we will apply fuel charges based on the mileage between destination A and destination B.
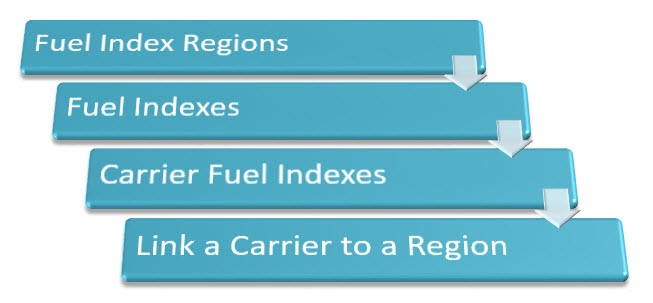
Let’s walk through the setups. In the picture below you can see the common workflow for the process:
Fuel Index Regions
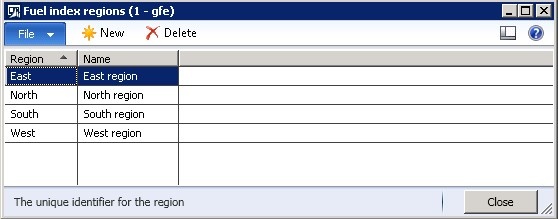
The fuel index region allows you to determine the variety of fuel prices by each region individually and set out where freight will be delivered.
To set up fuel index regions, follow these steps:
- Click Transportation management > Setup > General > Fuel index regions.
- Click New to create a fuel index region.
- Enter a unique identifier (ID) and a name for the fuel index region.
Fuel indexes are set by the Department of Energy (DOE) for the various regions of the United States. You are able to create explicit list of regions as follows:
| East Coast |
| New England |
| Central Atlantic |
| Lower Atlantic |
| Midwest |
| Gulf Coast |
| Rocky Mountain |
| West Coast |
| West Coast less California |
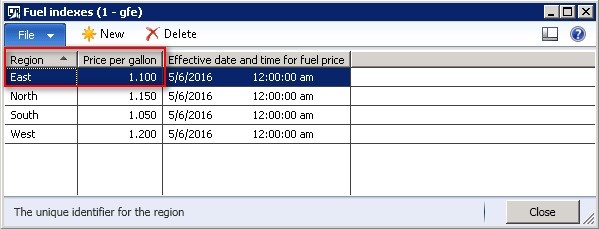
For our particular case, we are assuming that the prices vary by 4 regions: East, West, North, and South.
Fuel Index
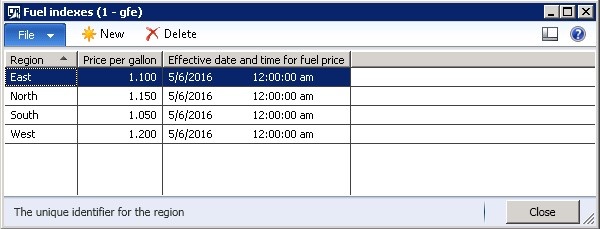
Fuel indexes which are associated to fuel index region determine fuel prices based on different date ranges. To reflect the change in fuel prices over time, you can associate a region with multiple fuel indexes.
To create a fuel index, follow these steps:
- Click Transportation management > Periodic > Fuel indexes.
- Click New.
- In the Region field, select a region.
- Enter the fuel price per gallon.
- In the Effective date and time for fuel price field, select the date and enter the time when the fuel index will go into effect.
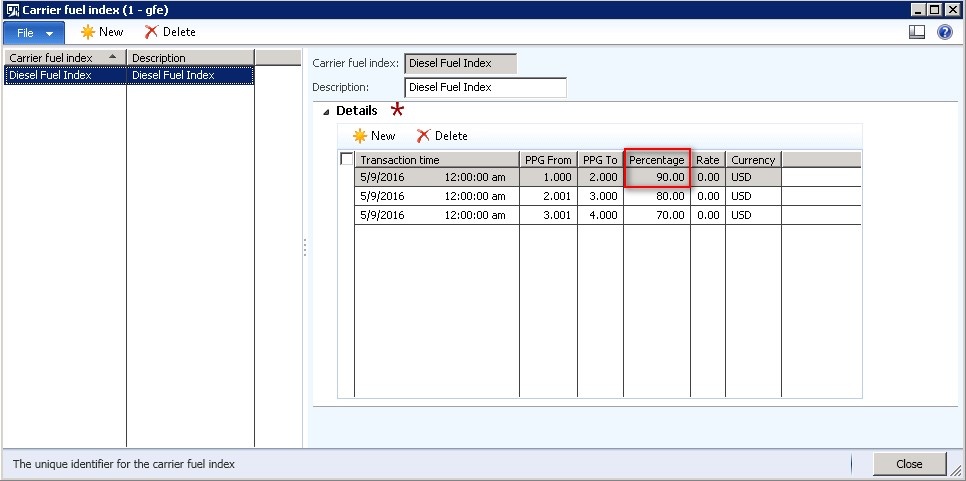
Carrier fuel index
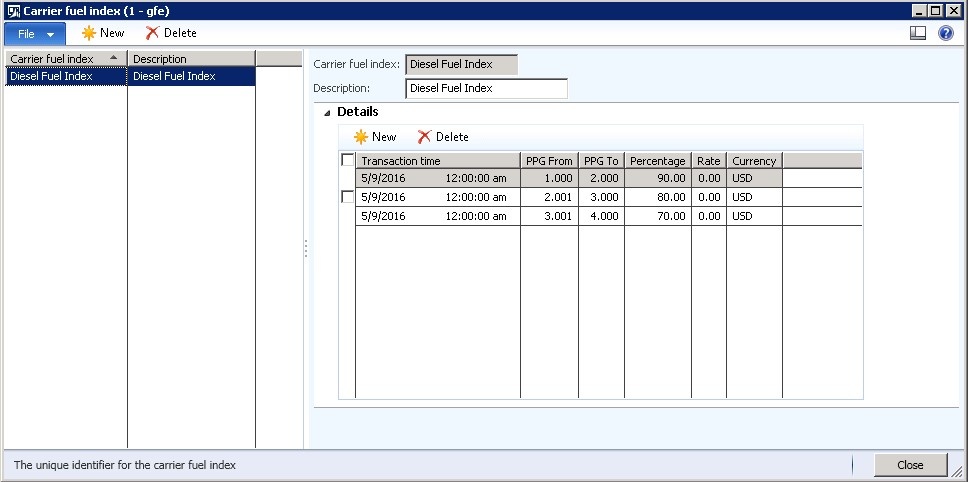
In the carrier fuel index, you specify the per-gallon fuel charge limits for the carrier.
To create a carrier fuel index, chose the appropriate option:
Option #1
- Click Transportation management > Setup > General > Shipping carrier > Carrier fuel index button.
Option#2
- Click Transportation management > Setup > General > Carrier fuel index.
- Click New.
- In the Carrier fuel index and Description fields, enter a name and description for the fuel index.
- On the Details FastTab, click New.
- Create a transaction time frame, and complete the following fields.
| Field |
Description |
| PPG From, PPG To |
Enter the price range for the price per gallon. A fuel price in this range is added to the freight charges. |
| Percentage |
Enter the percentage of the freight surcharge that is added to the rate. This is a percentage of the accessorial unit that is specified in the carrier’s accessorial assignment. |
| Rate |
Enter a flat rate to cover the freight surcharge. This rate is added to the rate that is calculated for the carrier. |
| Currency |
Enter the currency of the index. |
Define the association of prices for fuel charges with the carrier and fuel index regions. You can create the following data (using Percentage):
- If fuel price between 1$ per gallon and 2$ per gallon we will charge 90% per mile
- If fuel price between 2.001$ per gallon and 3$ per gallon we will charge 80% per mile
- If fuel price between 3.001$ per gallon and 4$ per gallon we will charge 70% per mile
You can create the following data (using Rate):
- Charge $0.25 per mile when the price per gallon is less than $2;
- $0.27 per mile when the price per gallon is more than that and less than $3;
- $0.29 per mile when the price per gallon is more than $3.
Let’s take a look at the first case.
Fuel Surcharge
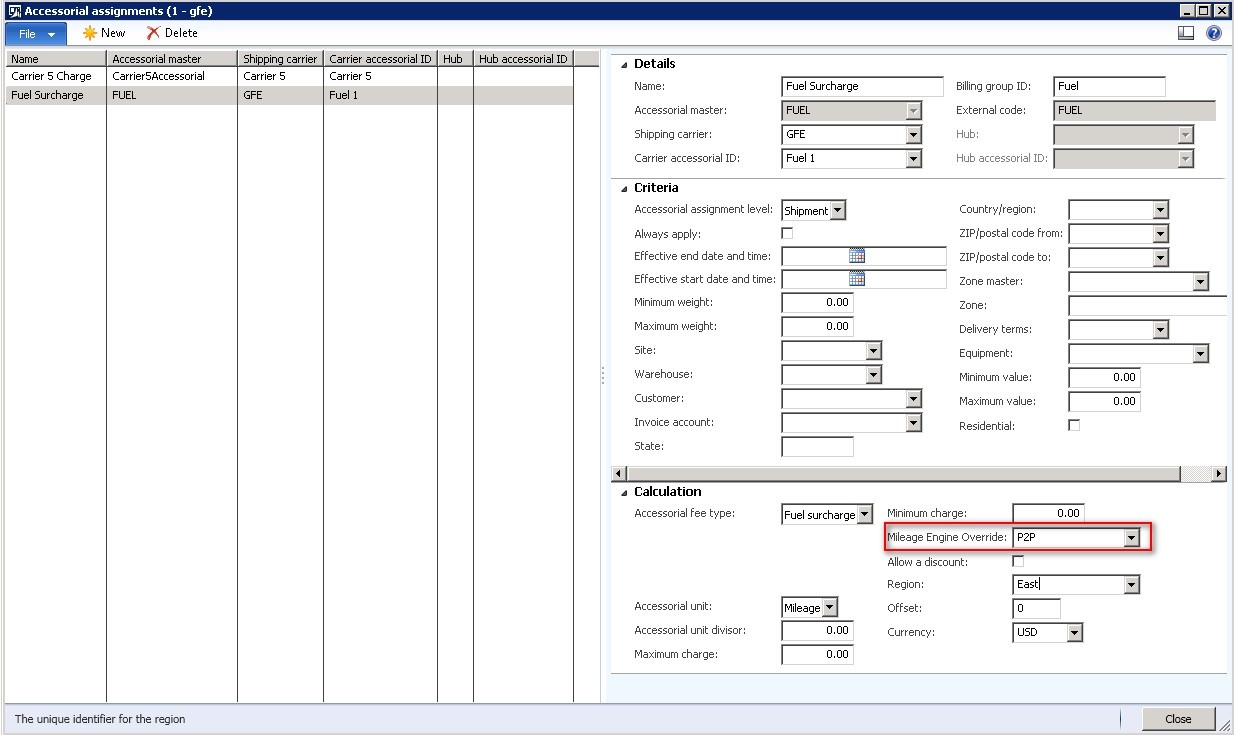
To calculate fuel surcharges for a shipping carrier, you must specify a fuel index region together with the carrier’s accessorial assignment.
To associate a shipping carrier with a fuel index region, follow these steps:
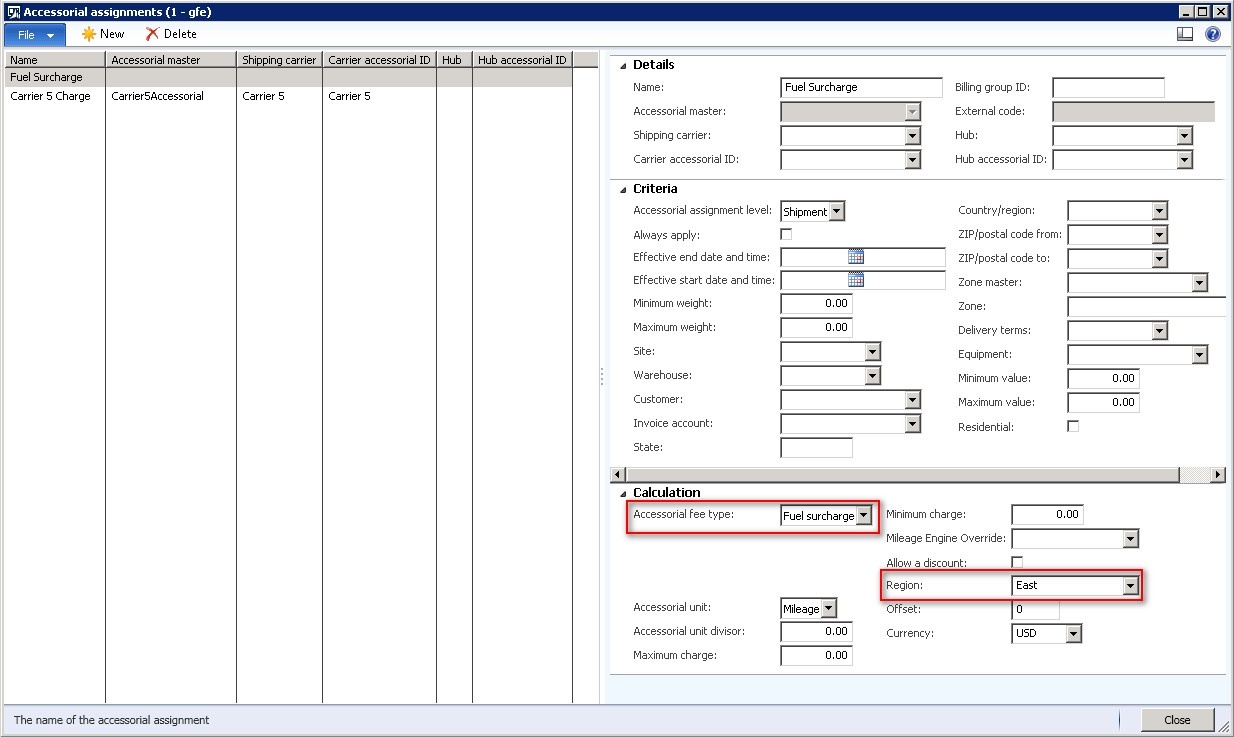
- Click Transportation management > Setup > Rating > Accessorial assignments.
- Select an accessorial assignment for a shipping carrier.
- On the Calculation FastTab, in the Accessorial fee type field, select Fuel surcharge.
- In the Region field, select the fuel index region.
Make sure that the charge applies to the selected region and is calculated based on mileage.
Accessorial Master
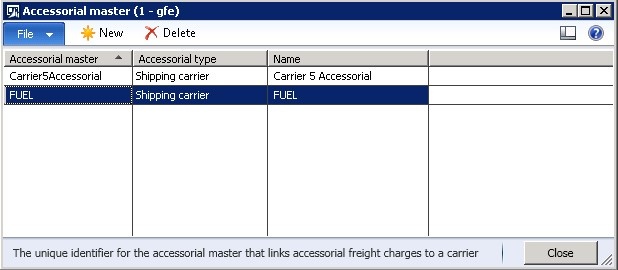
You can categorize accessorial charges to guarantee that a particular type of charge, such as a fuel surcharge, is applied only once. These charge categories are called accessorial masters. To create accessorial master, follow these steps:
- Click Transportation management > Setup > Rating > Accessorial master
- Click New
- Enter an ID and a descriptive name for the accessorial master
- In the Accessorial type field, select either Shipping carrier or Hub
You must set up an accessorial master before you can set up a carrier accessorial.
Billing Group
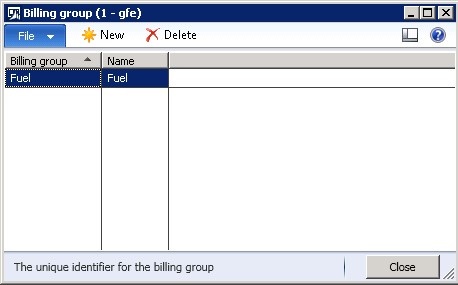
When actual freight bill and freight invoice are recorded, we will be able to identify different charges by using billing groups. Because a fuel charge is considered a very specific, standard type of charge, we should make sure that we have a specific billing group for it.
Create specific billing group for fuel charges. To create billing group, follow these steps:
- Click Transportation management > Setup > Freight reconciliation > Billing group
- Click New
- Enter an ID and a descriptive name for the billing group
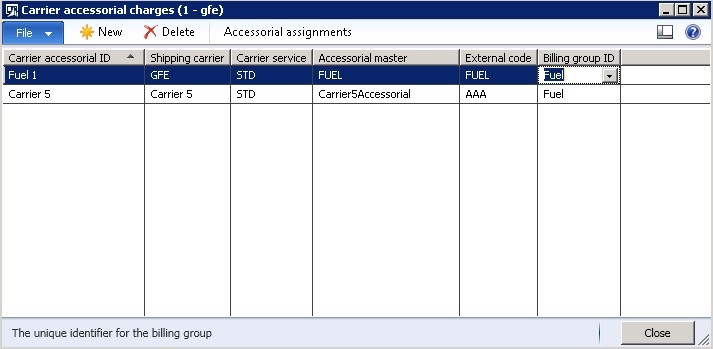
Carrier Accessorial Charges
Carrier accessorial charges allow you associate a particular type of charge with the carrier and billing group. You have ability to specify the external code of the charge, which is the code that appears on the transportation vendor invoice line.
To create carrier accessorial charges, follow these steps:
- Click Transportation management > Setup > Rating > Carrier accessorial charges
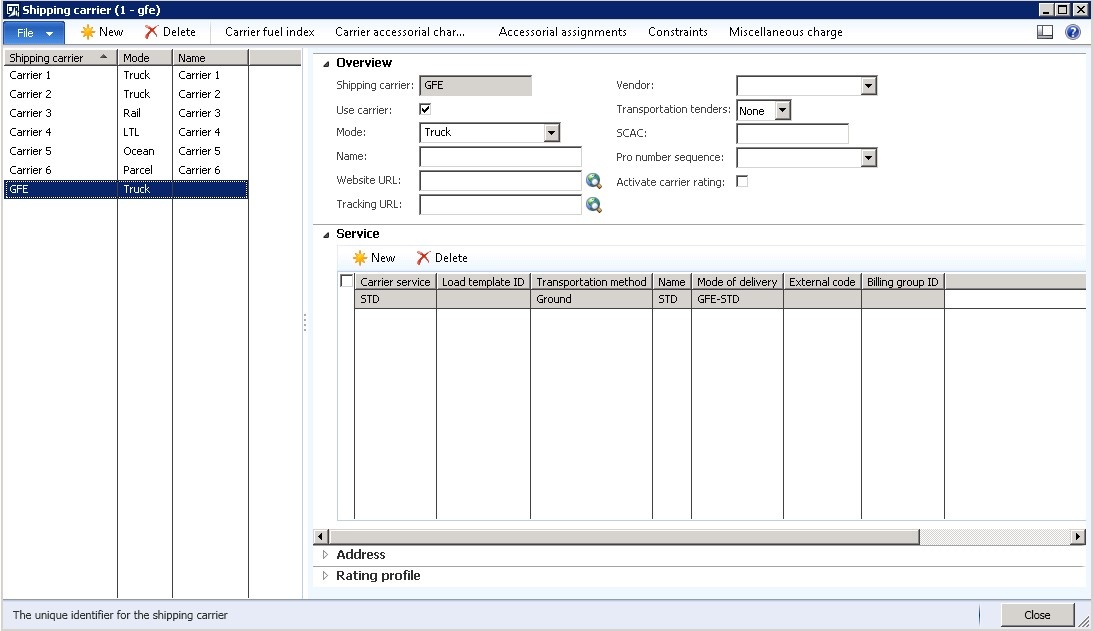
- Before you can create carrier accessorial charges you must create a shipping carrier as presented below:
- Click New
- Enter an ID for carrier accessorial charges, shipping carrier and so on as presented below: Assign created carrier accessorial charges for the Accessorial assignments
- Click Transportation management > Setup > Rating > Accessorial assignments.
- Select an accessorial assignment for a shipping carrier.
- On the Default FastTab, in the Carrier accessorial ID field, select created before Carrier accessorial ID.
- Choose Shipping carrier
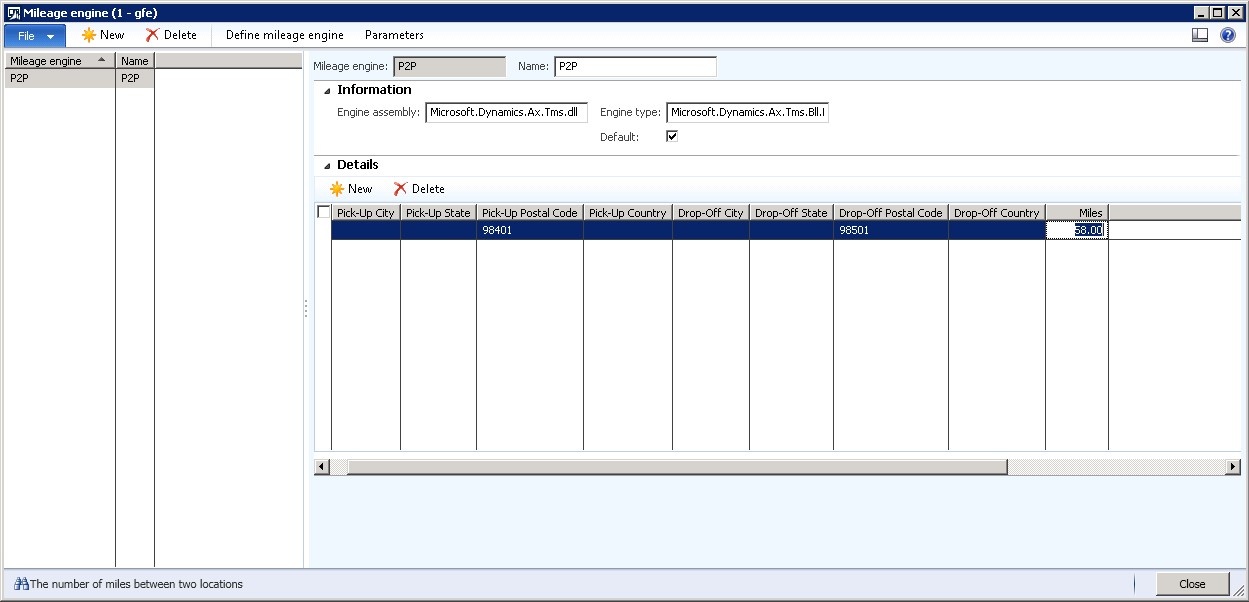
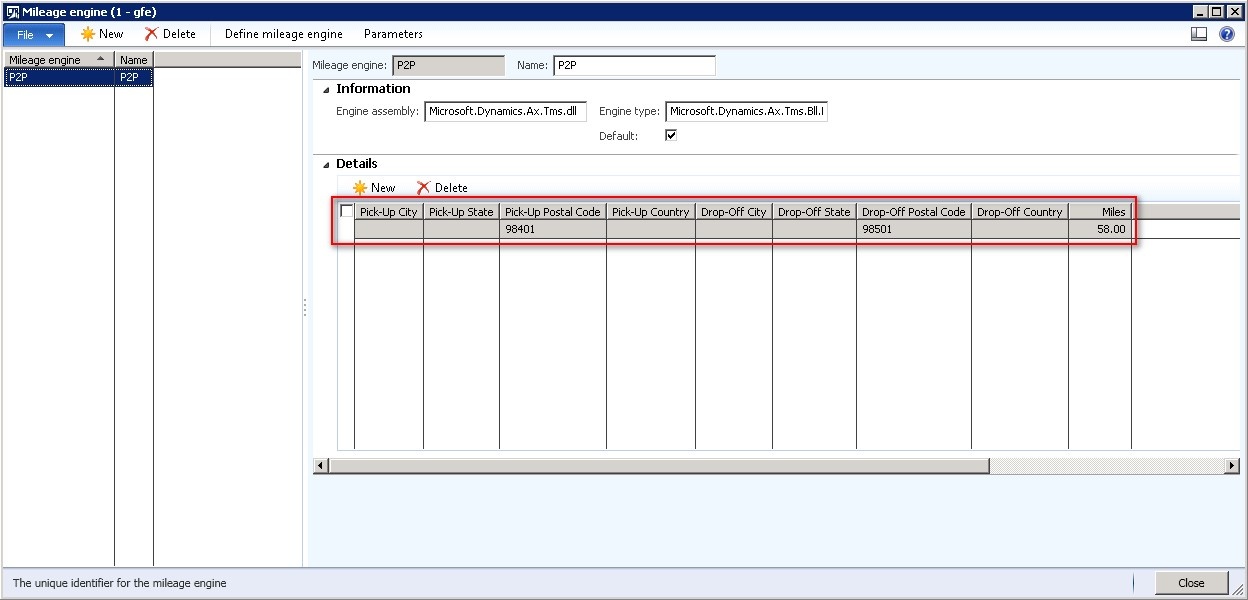
- Select P2P in the Mileage Engine Override field. This engine will be used to calculate the travel distance from point A to the destination location B.
- To create new Mileage engine, click Transportation management > Setup > Engines > Mileage engine
- Click New
- Go back to the Accessorial assignments and specify created mileage engine
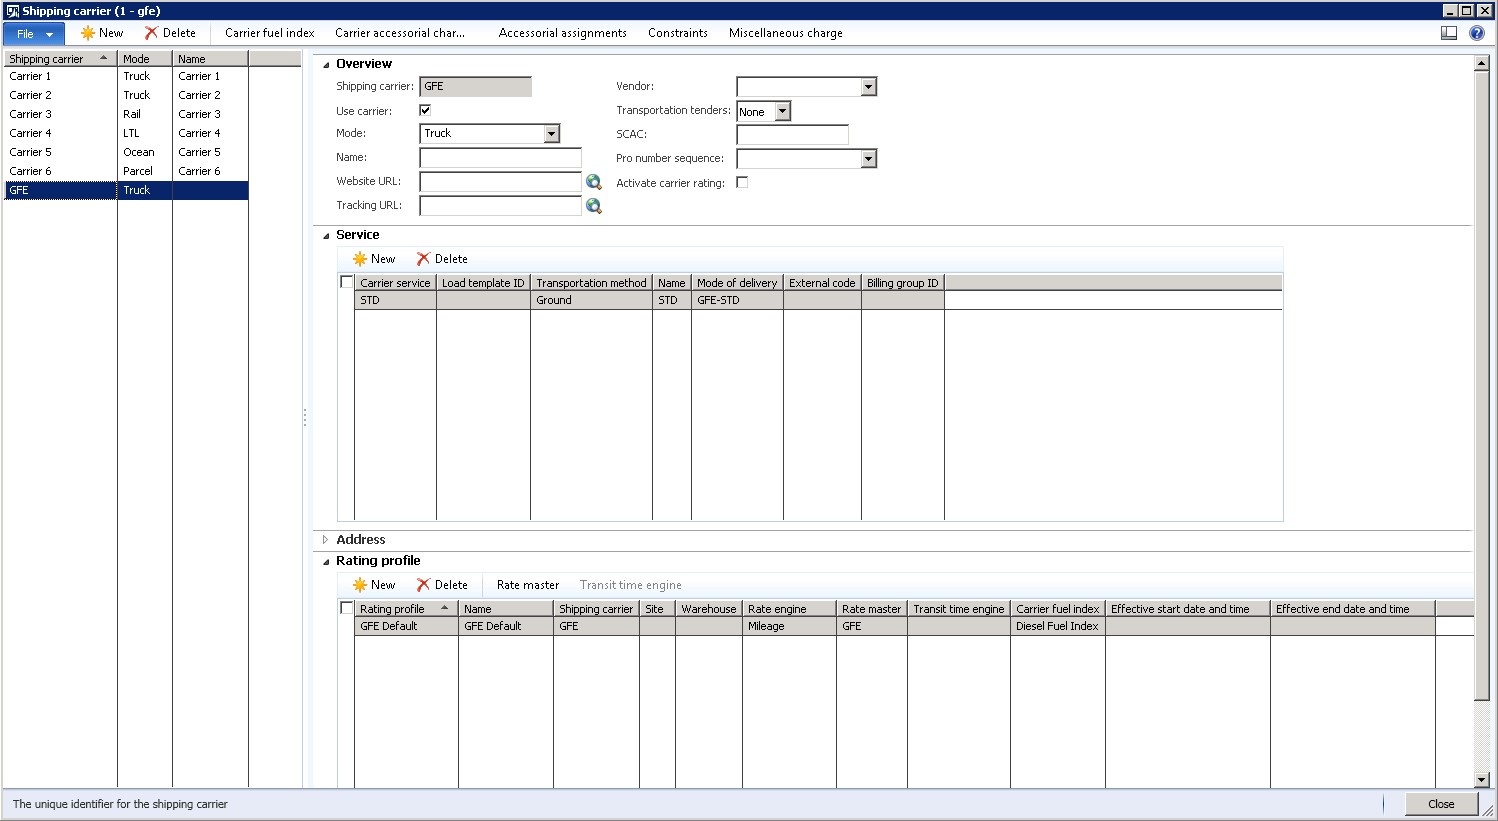
Rating Profile
Make sure that the rating profile that is associated with the shipping carrier uses the correct carrier fuel index.
- Click Transportation management > Setup > General > Shipping carrier
- Expand Rating profile Fast tab
- Create rating profile as presented below:
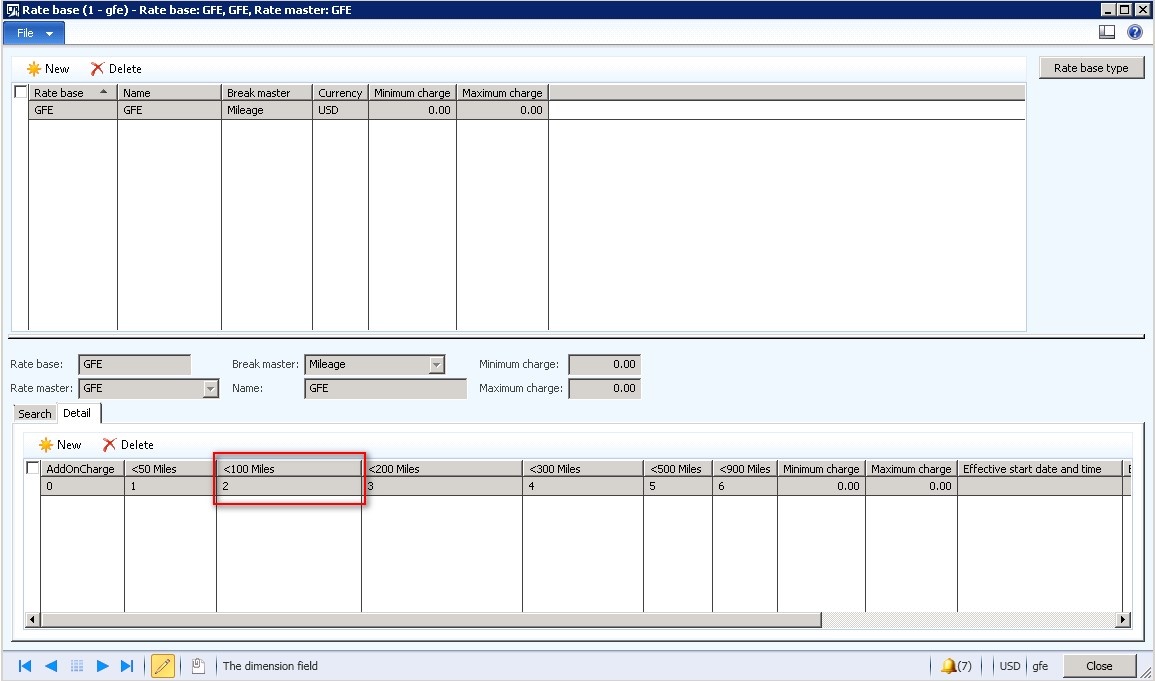
Rate Master
The rate master contains several rate base assignment records. These are used to select a subset of rating data, based on specific criteria, such as the pickup address.
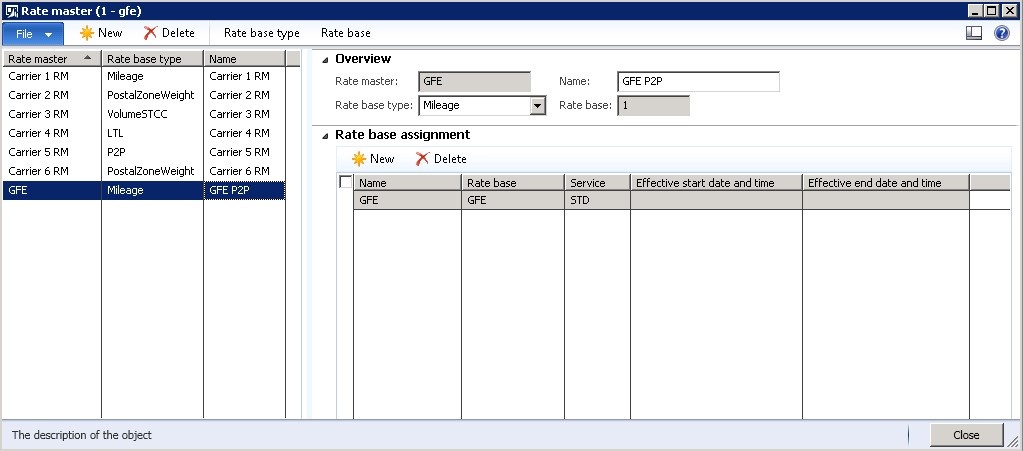
- Click Transportation management > Setup > Rating > Rate master
- Click New
- Specify Rate master ID, Rate base type and name
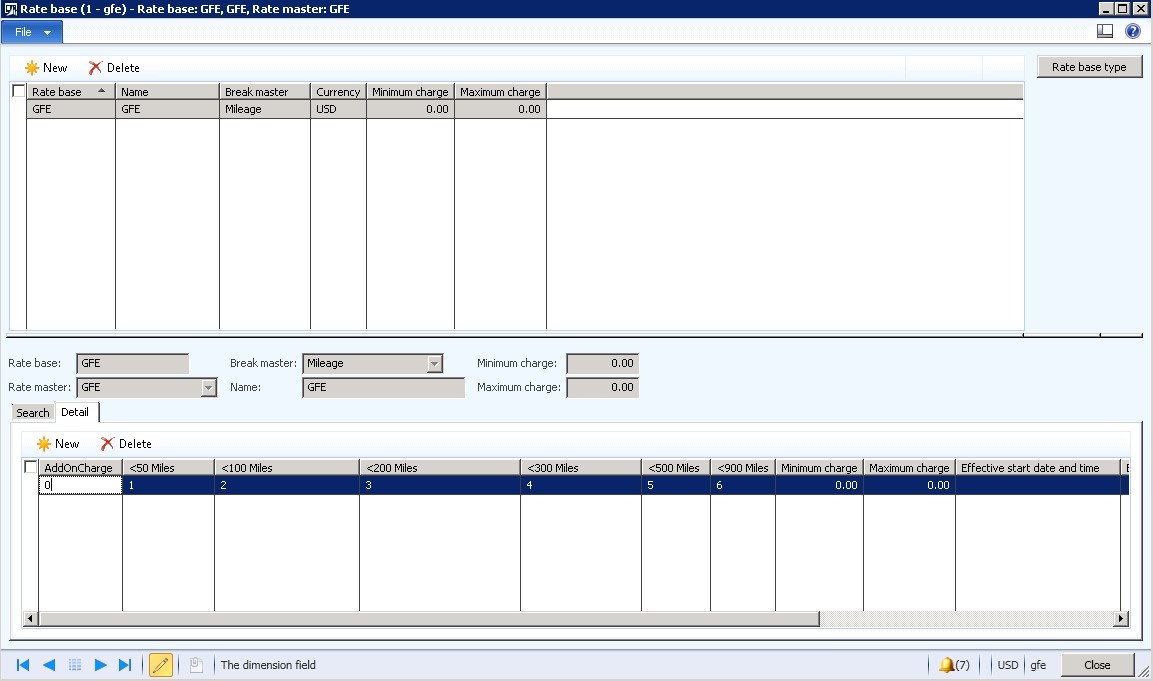
- Right-click in the Rate base field, click View details to open the Rate base form, and then create the data that is shown in the following screen shot:
- Assign rate base to the rate master
How It Works
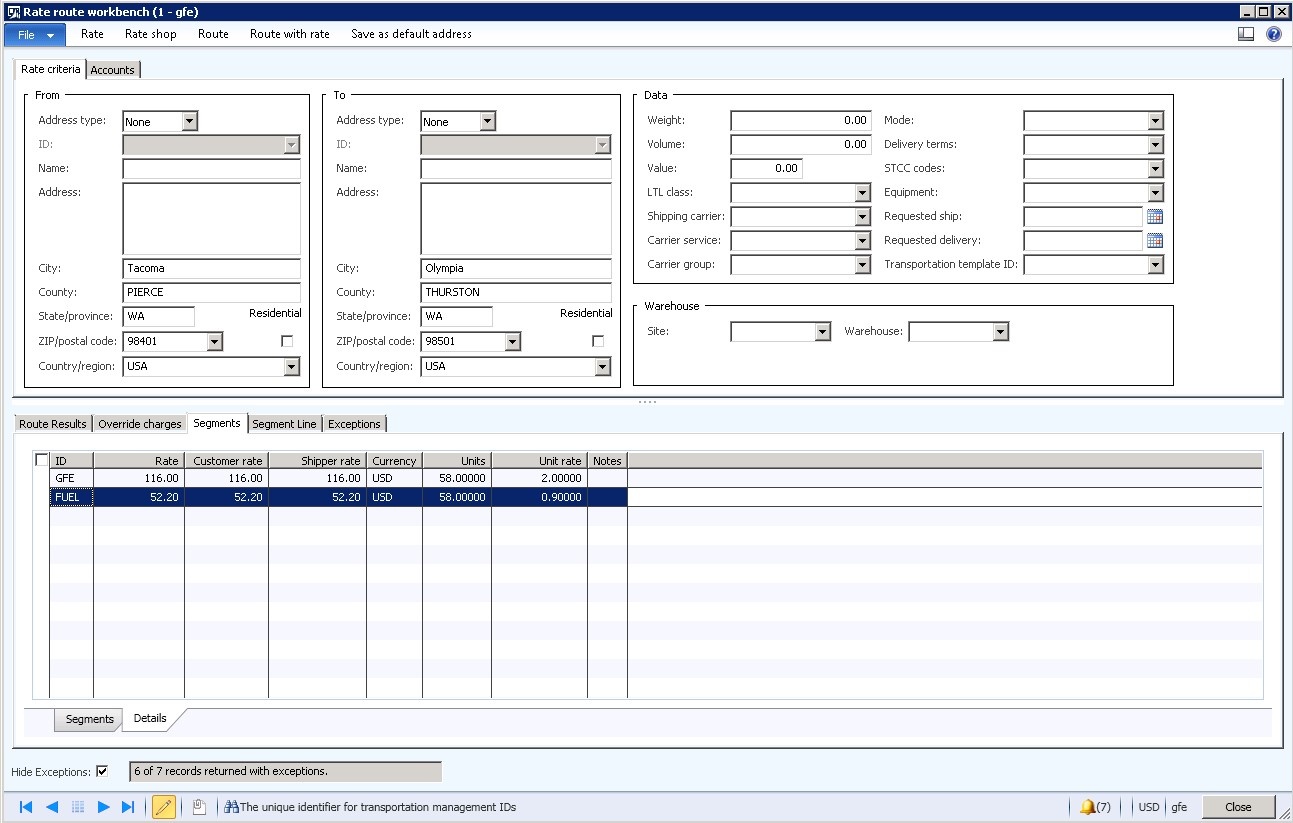
Test the current setup – the FUEL charge should appear next to the base freight charge.
- Click Transportation management > Inquiries > Rate route workbench
- Specify the source, the destination
- Click Rate shop. You should receive a rate for shipping carrier GFE.
- In the lower pane, on the Segments tab, click the Details tab
You should see two records: GFE corresponds to the freight charge that is specific to Washington state, and FUEL is the new surcharge, which is the product of the mileage and the rate per mile at the current fuel prices in the east region.
Let’s go through unit rates for both records in detail.
- Units equal to 58 is total number of miles, from Milestone engine
- Unit rate equal to 2 is taken from the Rate base. As we have less than 100 miles, rate is 2
- Unit rate equal to 0.9 is taken from Carrier fuel index
- Since current fuel price is between 1 and 2
I hope you found this tutorial beneficial!
Don’t forget to follow us on Twitter @Enavate or connect with us via LinkedIn to stay up-to-date on the latest from The AX Blog!
Meet the Author - Galyna Fedorova
Galyna is a Microsoft Certified Dynamics Professional with 5+ years of full lifecycle Dynamics AX implementations experience (Analysis – Deployment). Galyna has experience working with Dynamics AX from Axapta 4.0 to AX 2012. She was involved from A to Z during the AX implementation project for a large industrial company as ERP Consultant and has been efficient with testing Dynamics AX solutions.