Microsoft Dynamics 365 Business Central can make your end-of-year Accounts Payable duties more efficient. Watch this demo or read-on to learn more:
- Computer Check & ACH payment configuration
- How to create payment batches for checks and ACH
- How to use Payment Method codes to automate batch creation
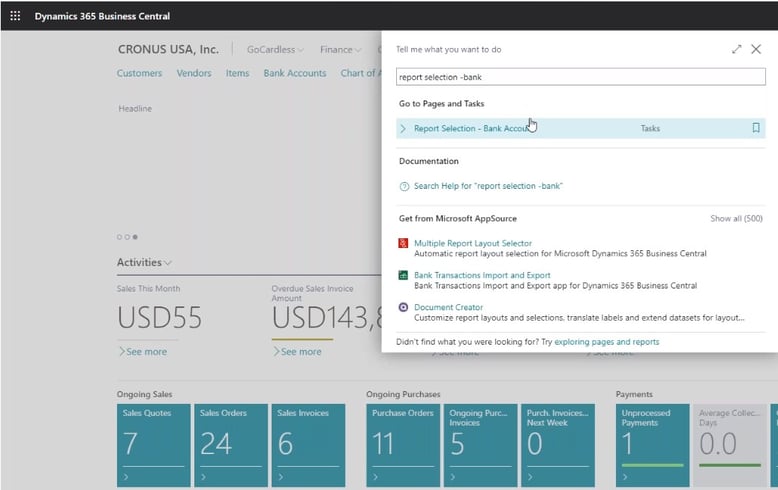
By default, Business Central offers four check layout options. Start by searching for “report selection bank account.”
In this example, the check layout is “Check/Stub/Stub.”
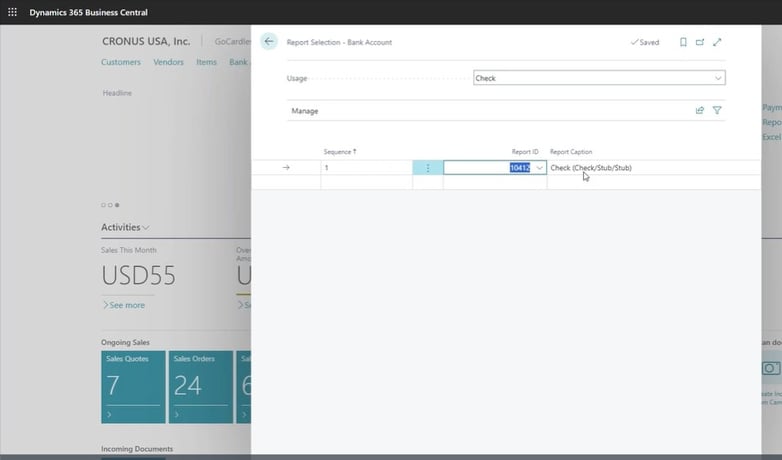
You can change your layout by changing the report ID number to one of the following:
- 1401 – Check/Stub
- 10401 – Stub/Stub/Check
- 10411 – Stub/Check/Stub
- 10412 – Check/Stub/Stub
Once you have the check format defined on your bank account, you can define a few of the fields, as well, such as how to format the check date.
First, go to your Bank Account Card. Then, select the Check Date Format you’d like to use.
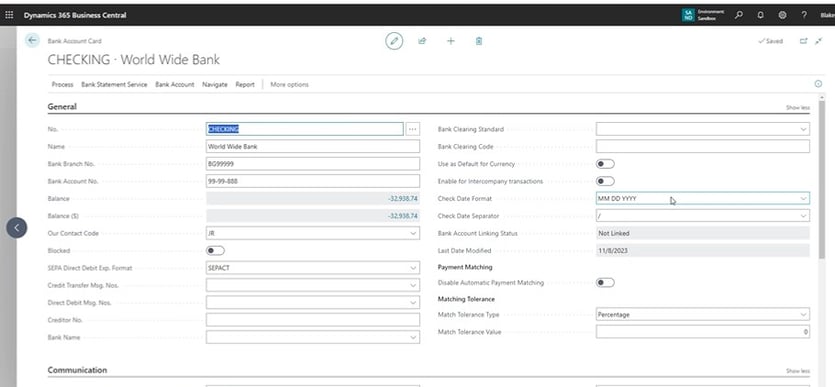
You can also choose between dots, dashes, and slashes with the Check Date Separator dropdown.
To have this change take effect with your next check, scroll down to Posting and enter the number of the last check written.

You can also go to your Payment Journal to create a check batch that will pre-fill some of those fields.
Just create “New” and balance with your bank account that you’ve got set up for the checks that you want to write.
How to Create Payment Batches
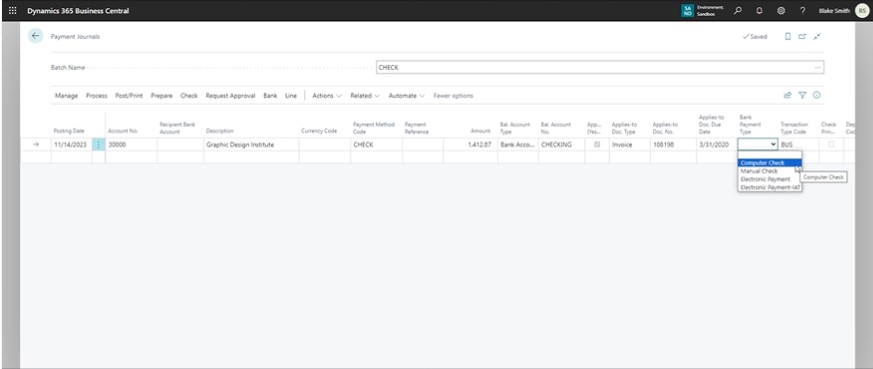
Start by going to your Payment Journal.
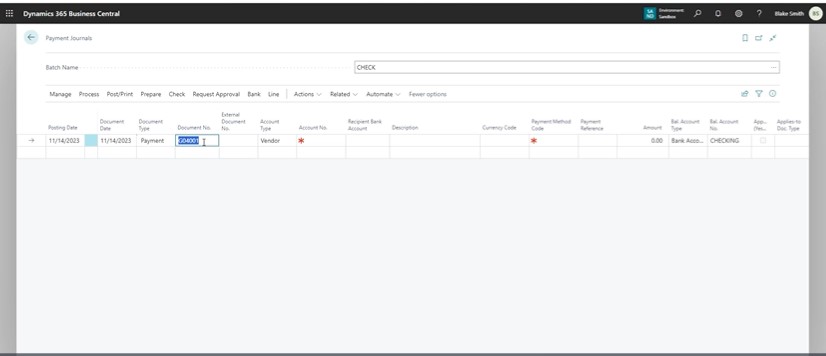
These are the required fields for a payment batch:
- Posting date
- Document type – In this case, “Payment.”
- Document number – This will pre-fill, but it will turn into your check number after you print your checks.
- Account type – In this case, “Vendor,” since that’s who you’ll be paying.
You don't necessarily need to fill in the Amount, because if you'd like to apply this payment to a specific invoice, or anything that's outstanding, you can define that, and it'll calculate the amount that you need to pay.
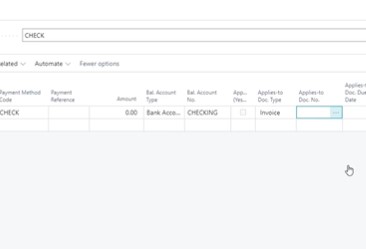
Find the Applies to Doc Type column and select Invoice. You’ll now have a list of available invoices you can pay for this vendor.
Next, select your invoice. Under Bank Payment Type, select Computer Check.
The difference between Computer Check and Manual Check is that Manual Check won’t print anything. You may use Manual Check if you needed to, for example, write a check on hand and give it to the vendor at that time. However, to print a check from Business Central, you’ll want to use the Computer Check option.
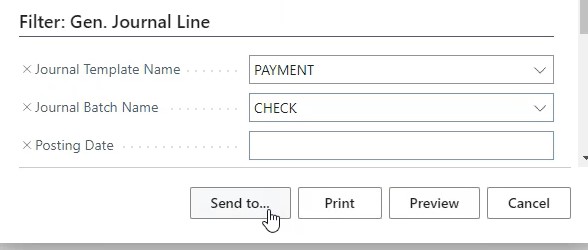
Once you have your payment batch created, go to Check, then Print Check.

Under Options, make sure you have the correct Bank Account selected. If it is, your Last Check No. will also pre-fill.
Once you’ve made sure everything is filled in correctly, you can send it directly to your printer by clicking Print. Otherwise, click Send To.
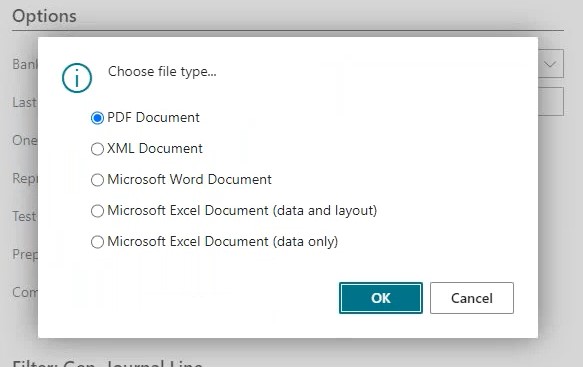
Choose your preferred file type and then click OK.
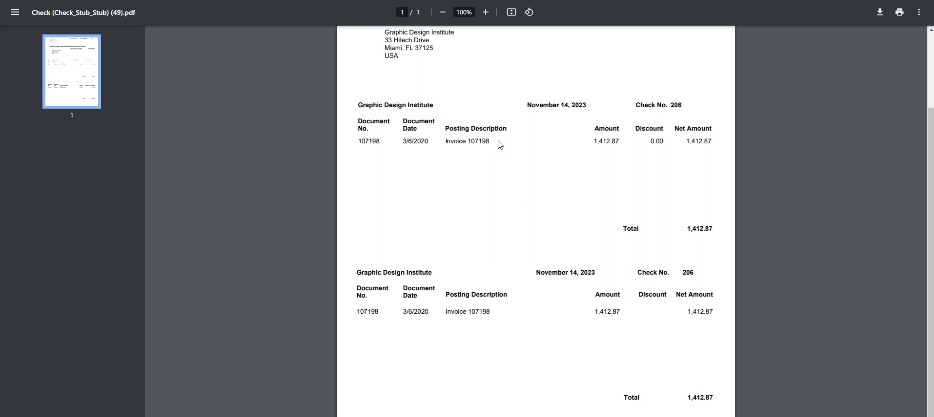
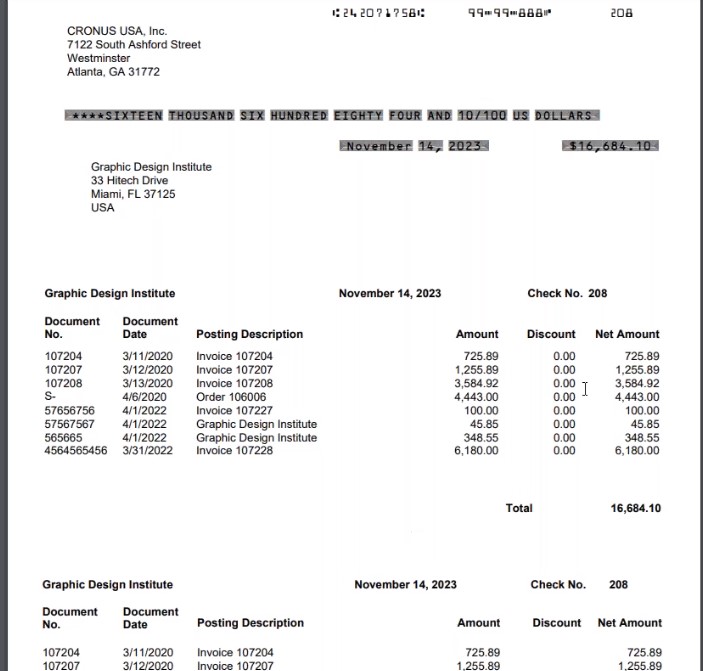
Here’s what the check stub will look like:

By default, Business Central will allow you to have up to 10 invoices. Once you exceed 10 invoices, it will print a secondary check, but it will say “Void.”
Let’s say you need to re-print your check. Simply go back to Print Check and toggle Reprint Checks.

ACH Payment Setup
If you don’t want to set up a check and instead pay your vendor digitally, you can use the ACH payment option.
First, go to your Bank Account Card.
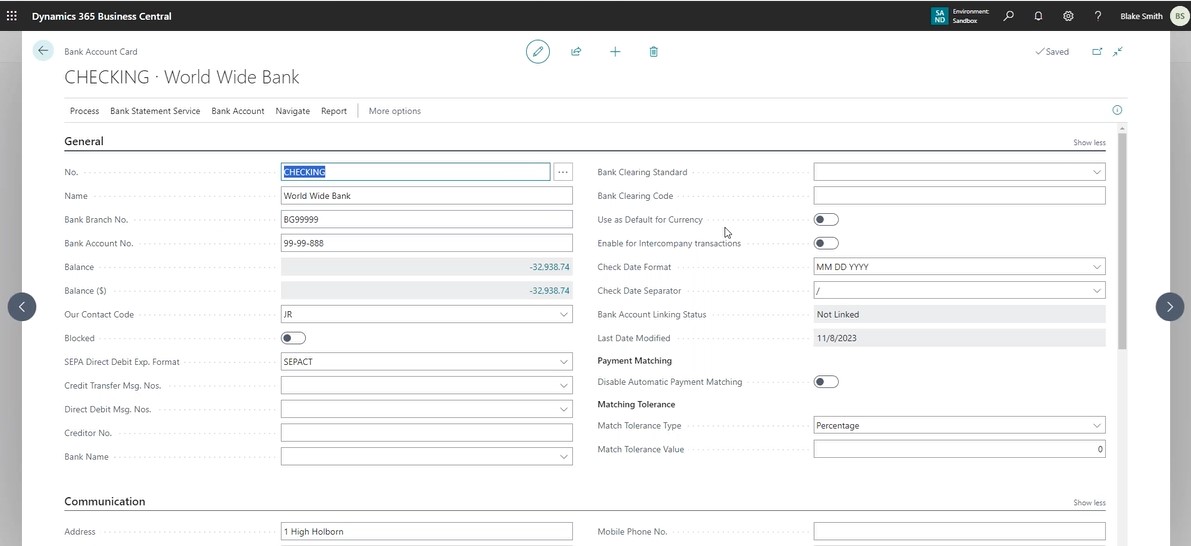
Fill out the Bank Branch No. and Bank Account No. Scroll down to Posting.
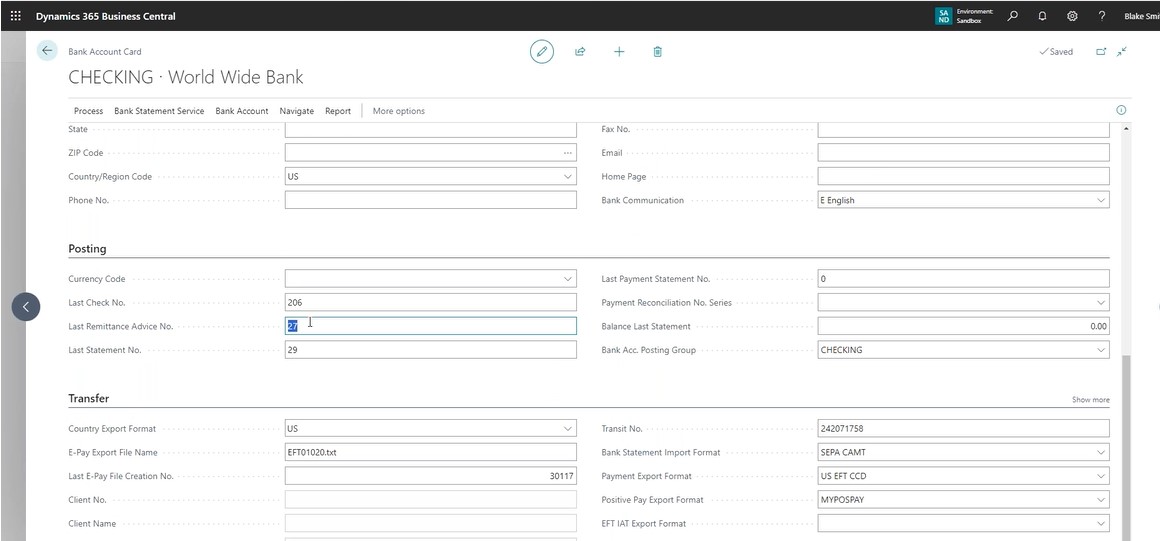
Enter a Remittance Advice No. This is something that you can share with your vendor if you would prefer the remittance information to come from you, rather than your bank.
Under Transfer, make sure your information is correct, including the Transit No., or routing number.
Next, go to your Vendor list and choose the Vendor you want to pay using ACH.
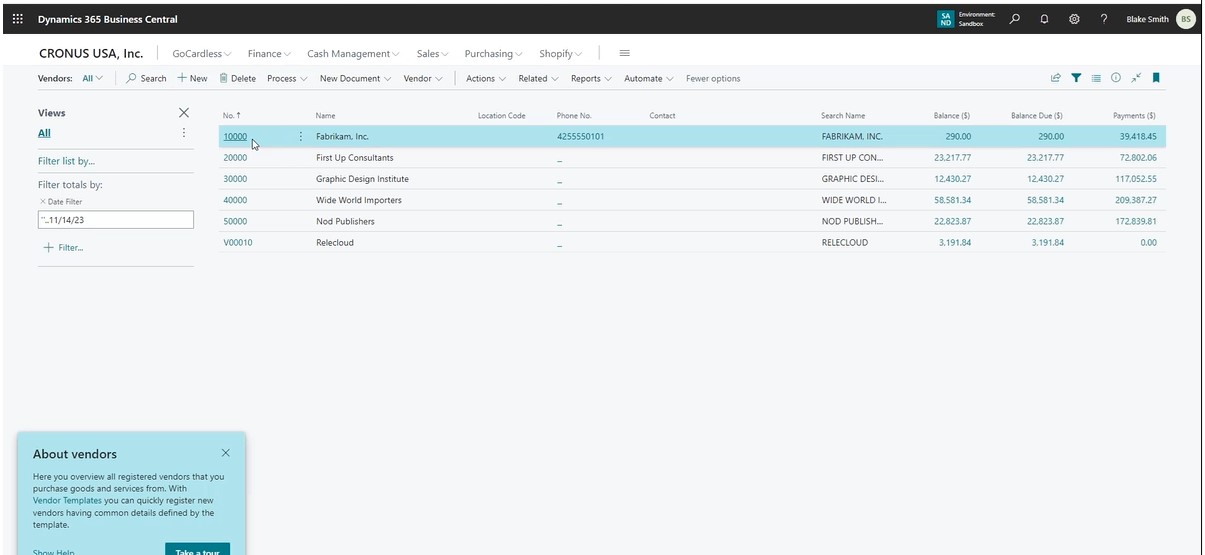
Go to Vendor, then click on Bank Accounts.
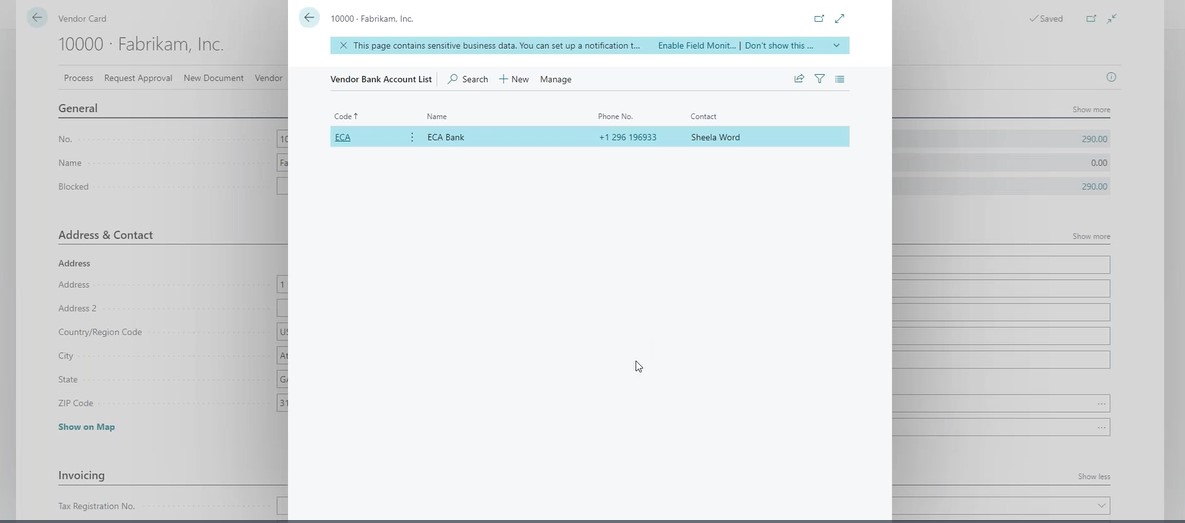
Select the Bank Account, and then define the code, branch number, account number, and transit number.
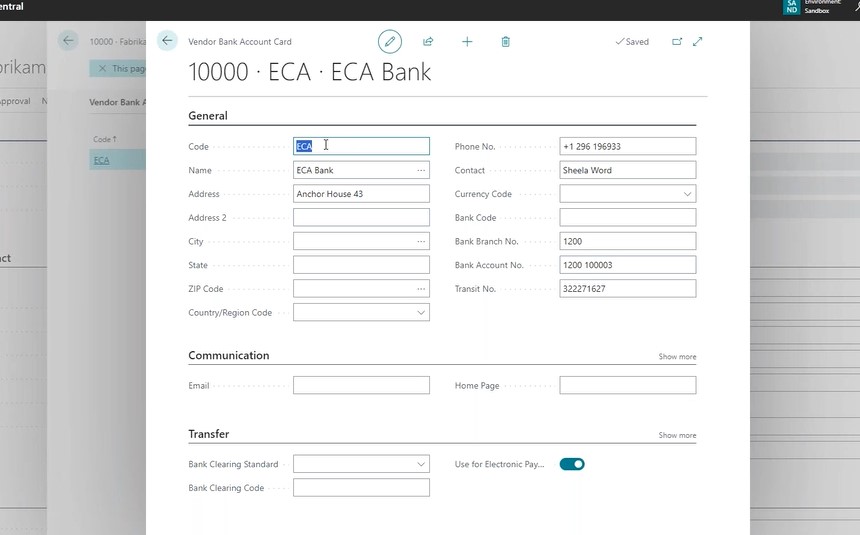
Under Transfer, make sure Use for Electronic Payment is toggled on.
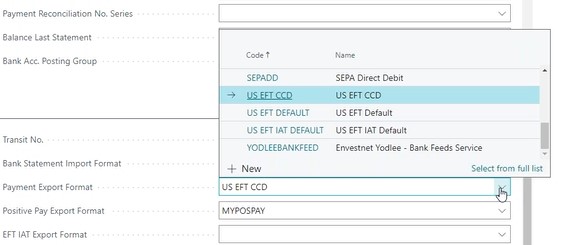
Back on the Bank Account Card, you can define the file layout you want to use under Payment Export Format.

You should see some templates that Business Central offers by default. If you don’t, reach out to the support team so we can get this option set up for you.
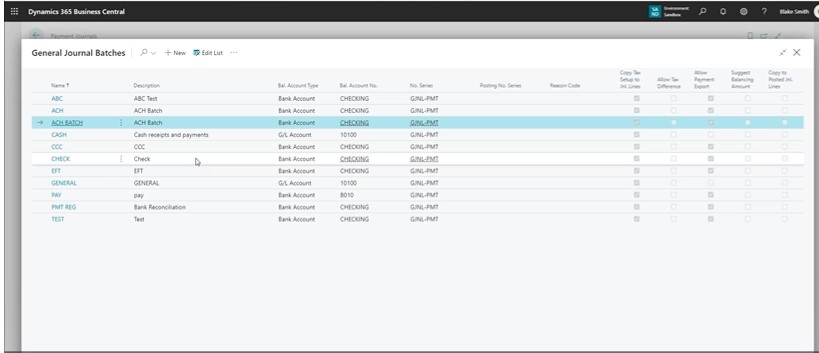
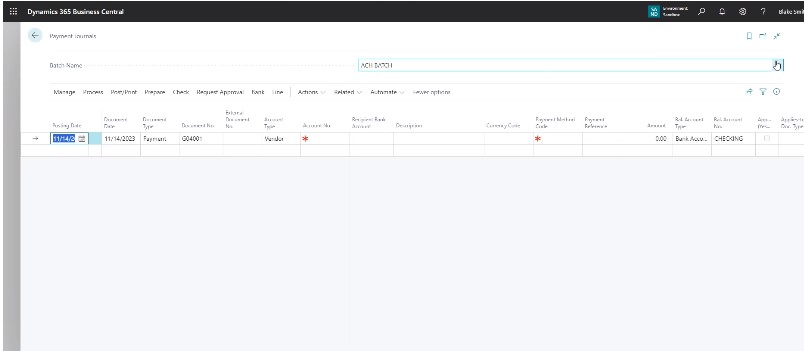
As with check batches, it’s best to create a journal for your ACH payments. Search for payment journals, select the account, select the batch name, and then select ACH Batch from the list of General Journal Batches.
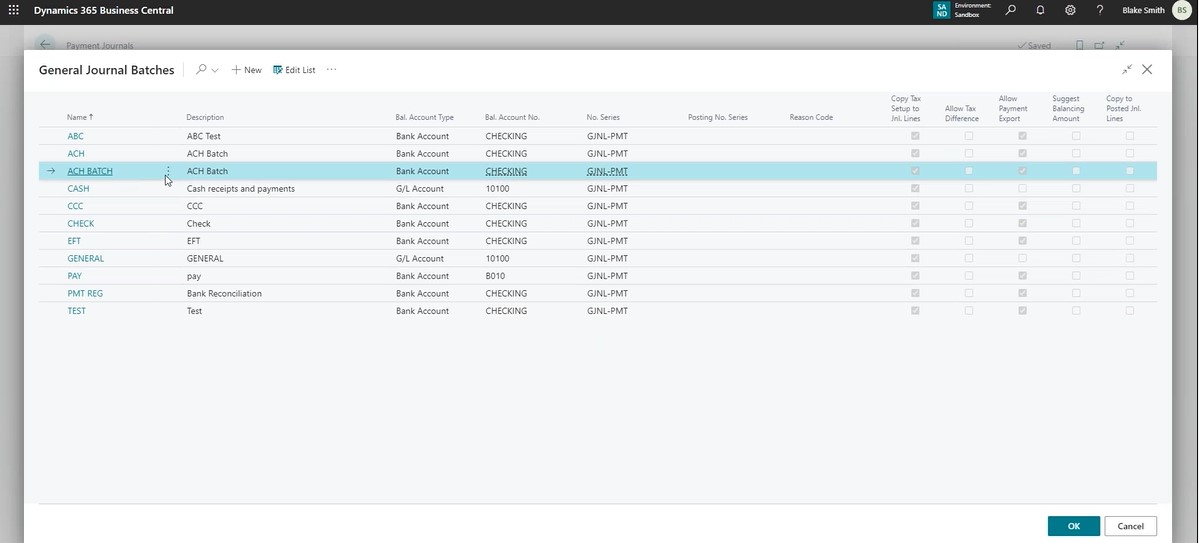
Make sure the Allow Payment Export box is checked.
Then, fill in the necessary details on the Payment Journals card.
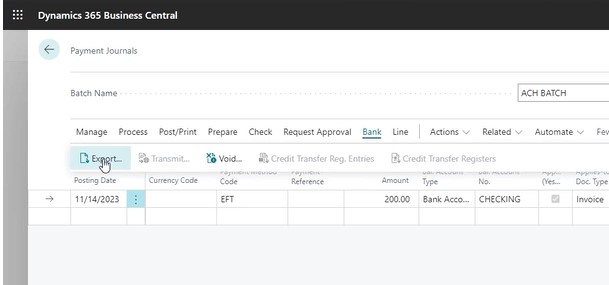
Finally, select Electronic Payment (or Electronic Payment-IAT if your country code format is not US).

To begin printing, select the Bank menu and then click Export.
Make sure you have the correct Bank Account No. or enter it if it’s missing.
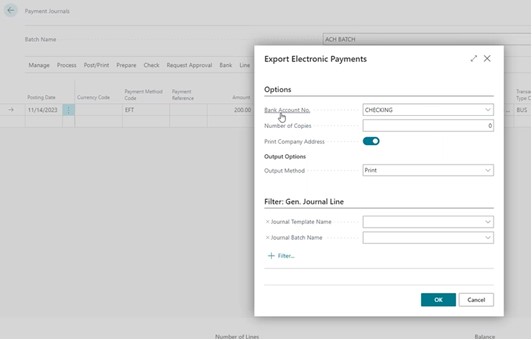
You can send remittance advice via email, but we suggest reaching out to our support team to get that set up.
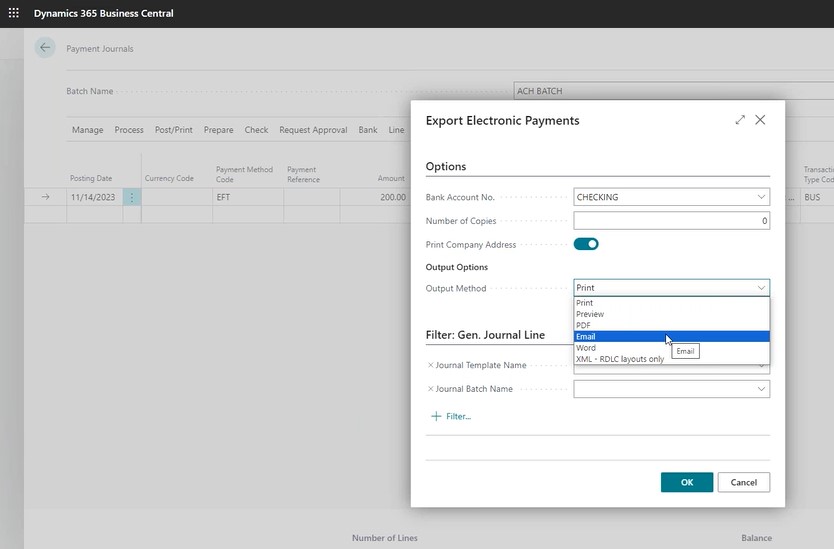
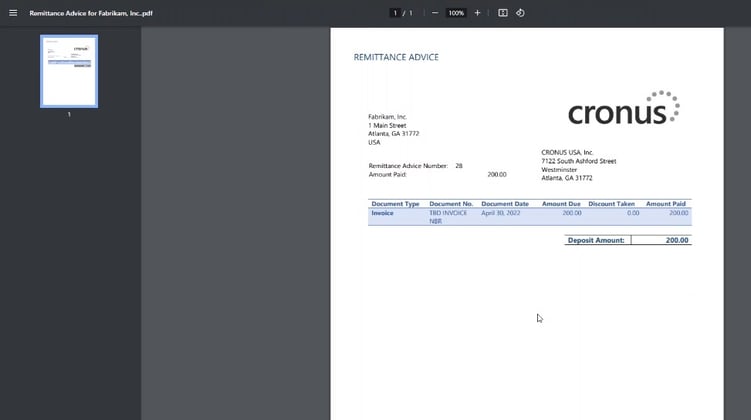
For now, we’ll select PDF and click OK to print. This is what the file will look like:
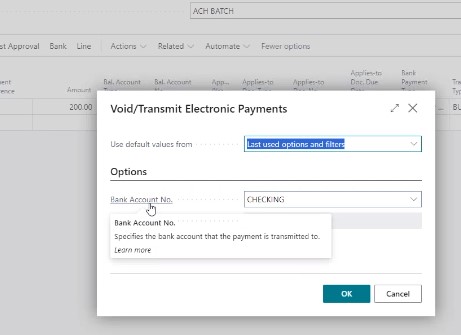
If you realize that something in the remittance is wrong, you can go back to the Payment Journals card, select the Bank menu, and then click Void.

Define your bank account number and click OK.
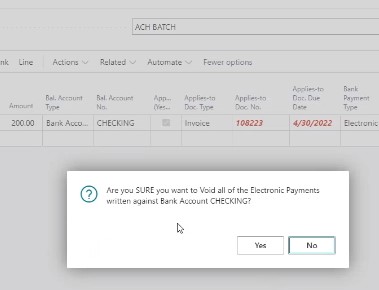
To go through with voiding the payments, click Yes.
The check print box will be deselected, and you’ll be able to add more lines.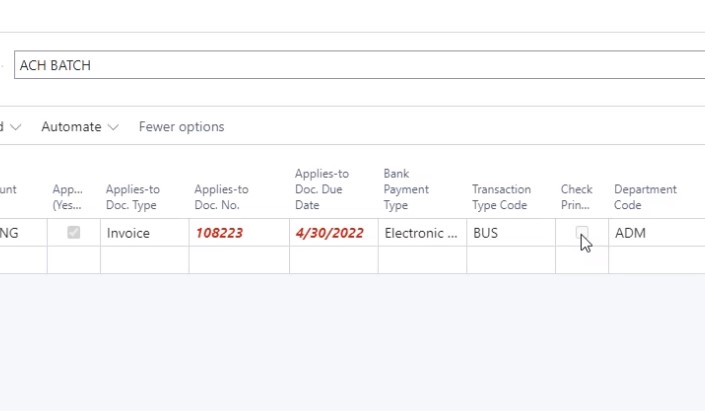
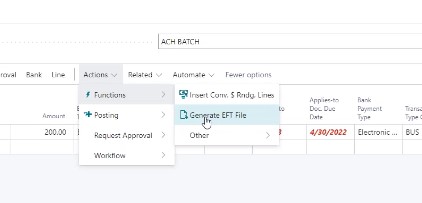
Next, export the file by clicking Action -> Functions -> Generate EFT File.
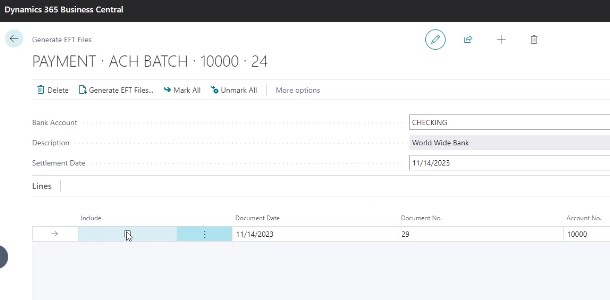
On the next screen, you can choose to include or not include each line item. Be aware that if you delete a line from this level, you cannot add it back without posting the batch and recreating it.
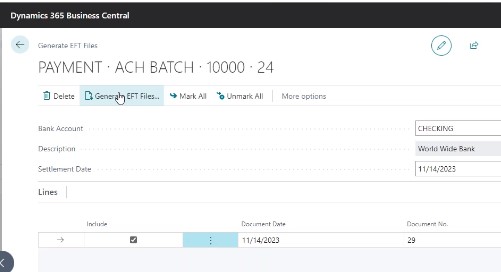
When you’re ready, click Generate EFT Files.
This is what the file will look like:
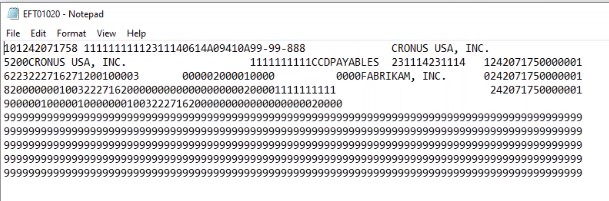
This is what you would upload on your bank’s site to pay the vendor.
If you find that the standard option for this isn’t viable because you need additional fields or information added, reach out to our support team, and we’ll help you make the necessary changes.
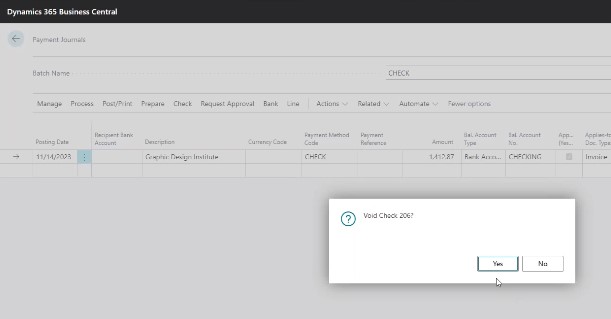
Now, if you need to void that check, toggle back over to the check batch. Then, click Check -> Void Check -> Yes.
How to Use Payment Method Codes to Automate Batch Creation
You can make this process a bit easier for yourself by using Payment Method codes. If you have some vendors that you always pay by check or by ACH, then you can create a Find That [?] on your vendor card.
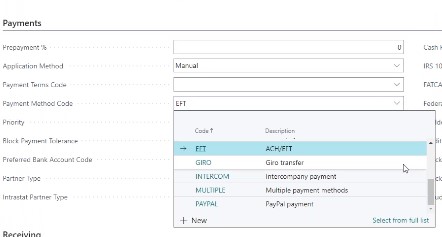
Go to your Vendor Card and then scroll down to the Payments section and find the Payment Method Code field.
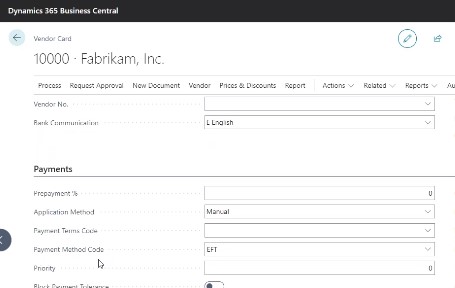
You’ll see some out-of-the-box options, such as EFT and Check. Make a selection depending on which option your Vendor prefers.
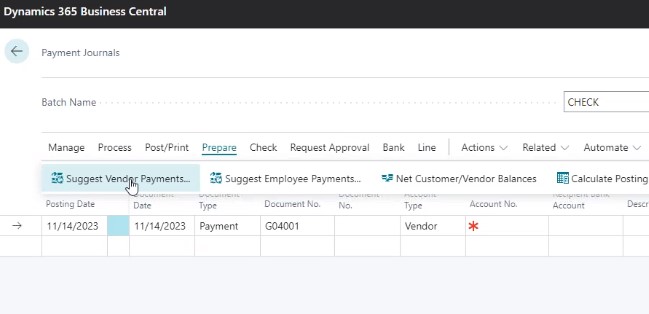
Back on the Payment Journals card, click Prepare -> Suggest Vendor Payments.
On the next screen, you can predefine many of the fields in the journal, such as the last payment date. This will make the software pull any invoices that are outstanding as of the selected date.
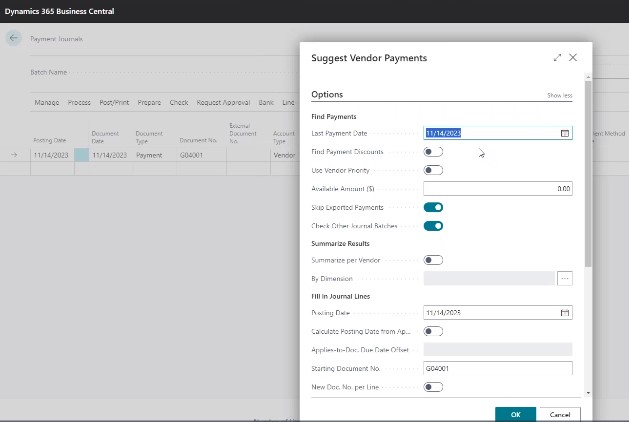
We also suggest toggling Check Other Journal Batches ON. If a payment in that batch was already set up by another user, this setting will allow the software to skip it and only include actual outstanding invoices.
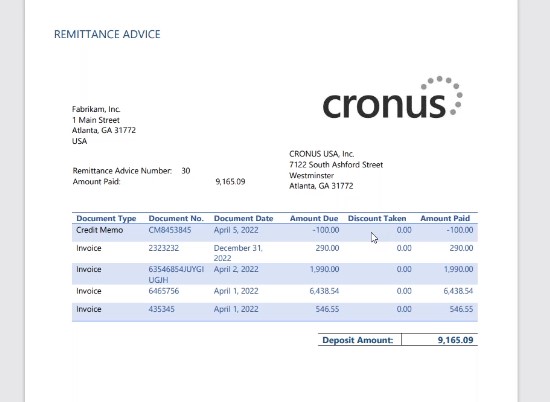
Another good option to have turned on is Summarize per Vendor. This will create one line per vendor and summarize all the invoices into one amount. This can be helpful if you want to have your remittance advice or stub list all of the invoices together, like so:
On the Suggest Vendor Payments screen, define your starting document number, your bank account number, and payment type.
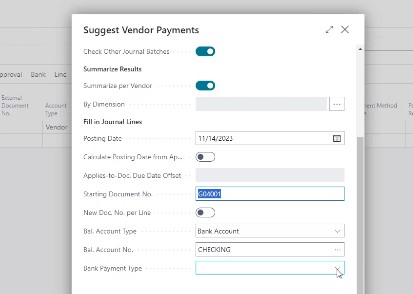
Make sure to predefine the Bank Payment Type, especially if you create a Batch with dozens of lines. Otherwise, you’d have to add the value on each line.
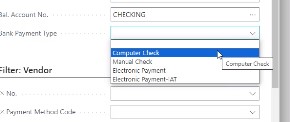
Next, you’ll filter the suggested payments by Payment Method Code. Select your chosen payment method from the Payment Method Code dropdown.

Then, click OK to run it.
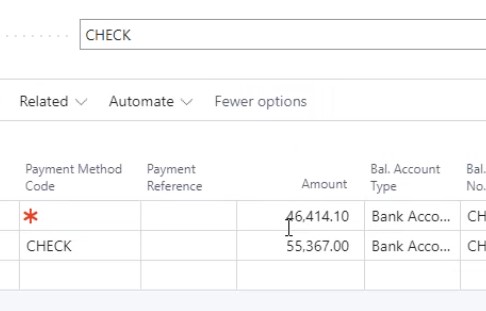
In this example, the payment amounts are very large, which implies that there are multiple invoices associated with this payment. Furthermore, the Applies to Doc Type fields are blank, but the payments have due dates. This indicates that there are multiple applied-to documents.
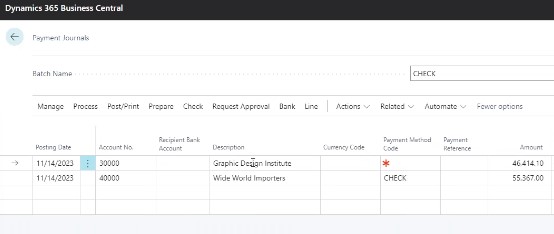
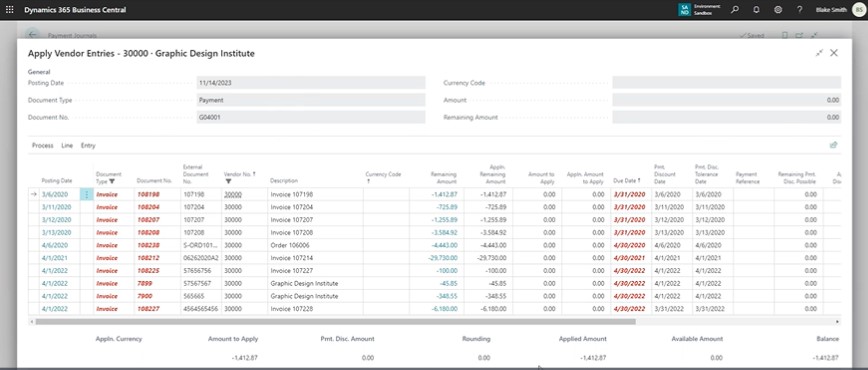
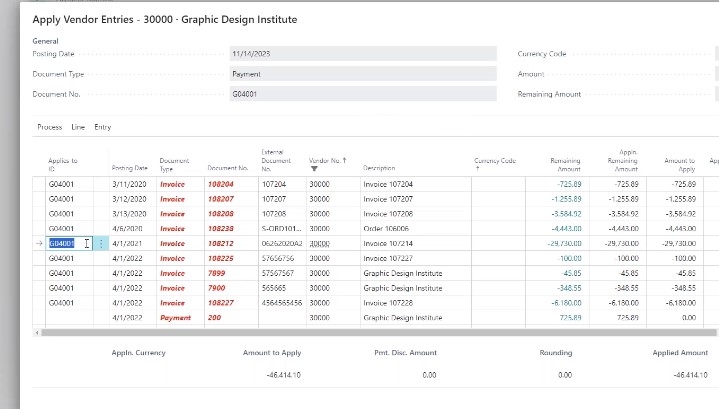
To see those items, click Process - > Apply Entries.

Using the Document number that's on the journal, you can see which of these invoices are intended to be paid now.
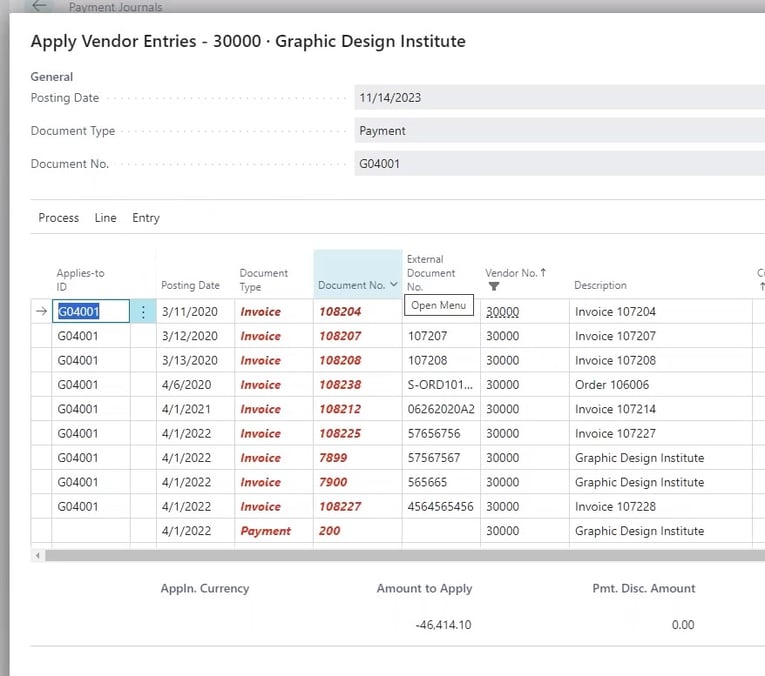
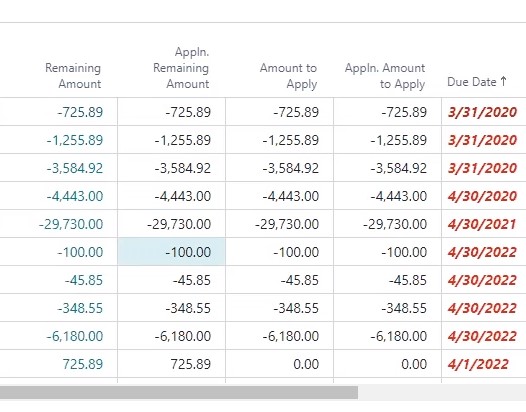
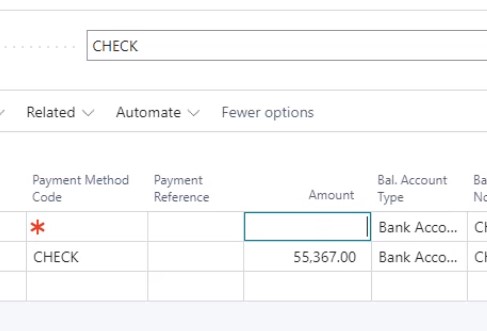
Let’s say you didn’t intend to pay the $29,730 invoice, but it’s still showing in the overall amount. Click Cancel to return to the Payment Journals card, and then delete the Amount for that batch.
Then, go back to Apply Entries, remove the ID for the amount in question, and click OK.
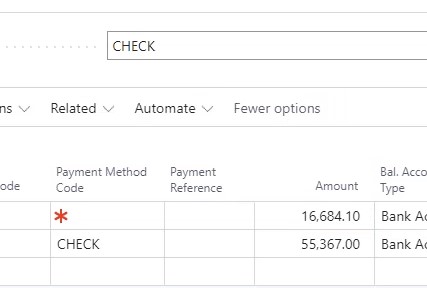
This will recalculate the amount for that batch so you can just pay the remaining invoices.
Now, when you print your check, you’ll see one check with multiple invoices.
Once you have your Check Batch printed, just go ahead and Post. The same process applies to ACH payments – just select EFT instead.
When you try to export the file, you may encounter an error, like so:
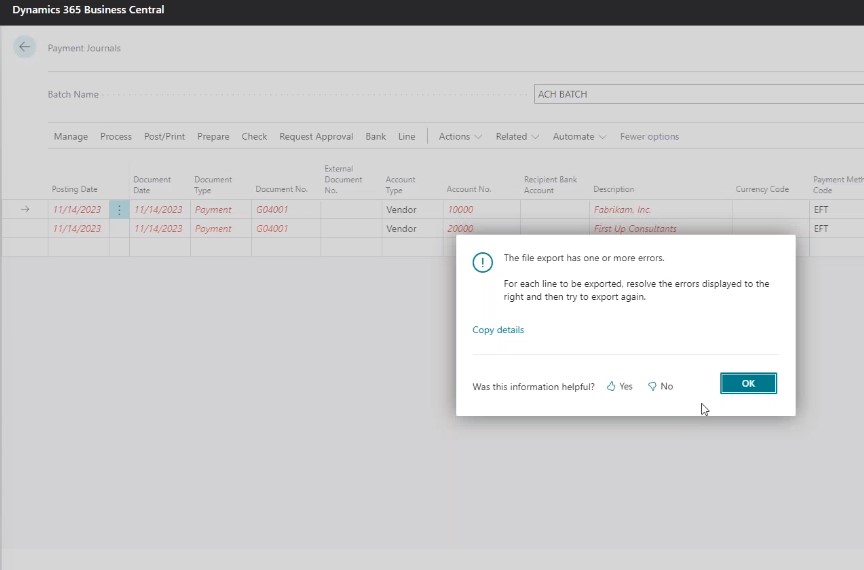
To learn more about the specific error(s), click the Info button and go down to Payment File Errors. In this case, we forgot to fill a Recipient Bank Account. 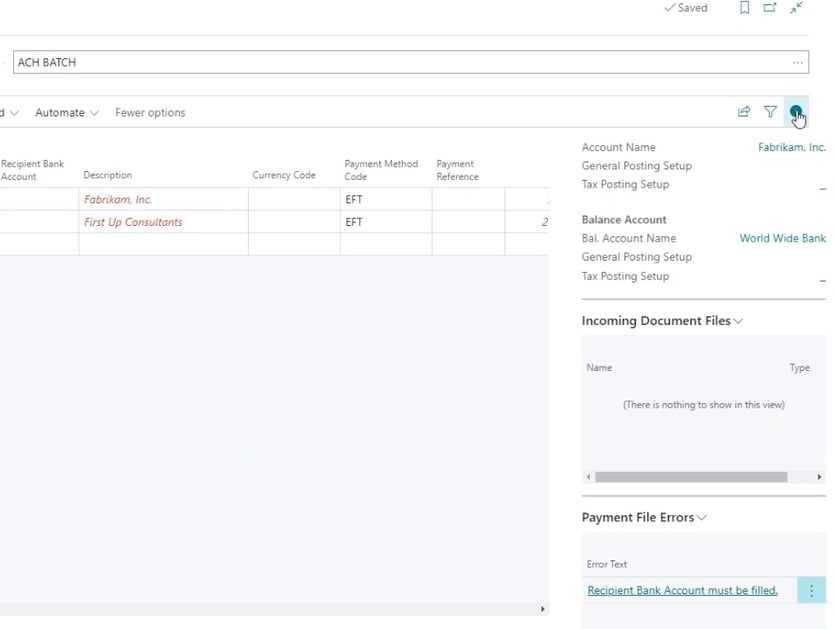
If it’s a more complicated error, feel free to reach out to our support team for help.
Once the error has been resolved, go to Bank -> Export. Check the options and then click OK.
If there are multiple remittances, you’ll get a zip file with everything that’s included in the apply-to.
Defining the Recipient Bank Account
If you have a primary bank account that the vendor would like to use, you can predefine that account. First, go to the Vendor Card.
Under Payments, you’ll find a Preferred Bank Account Code field.
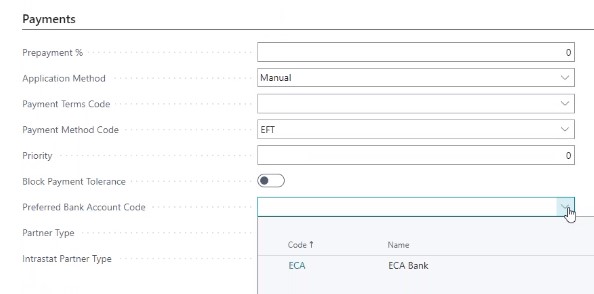
This will list all the Bank Account Codes you’ve set up. Select the one you’d like to use, and the next time you run your Batch, it will fill in the recipient bank account for you.
With your Payment Method Codes set, you can create batches with far less effort moving forward.
If you’d like to watch a demo video that covers all of this, click here. And if you need more support, just reach out to our expert team.