One of the best ways to streamline your internal processes in Business Central is by using approval workflows. Read on to learn how to set up approval workflows in order to ensure that you’re working as efficiently as possible. We’ll also take a quick look at how Power Automate can make the process of creating workflows itself more efficient.
What are Approval Workflows?
Approval workflows are tasks that are triggered by an action, condition or rule. They can be used for improving the separation of duties, enhancing security on master record changes or applying best practices. For example, you can set up an approval workflow to require a manager’s approval before creating a new customer, changing a vendor’s bank account or posting a purchase invoice.
Approval workflows are important because they:
- Reduce manual tasks and paperwork.
- Provide better traceability on who requested an approval, the reasons for their request, and who ultimately approved it.
- Speed up decisions by making it easier to review and approve requests while on the go.
How to Set Up an Approval Workflow
Setting up an approval workflow is a five-step process:
- First, set up the workflow users and user groups. These are the users who will participate in the workflow, either as requesters or approvers.
- Once you’ve selected the participating users, you’ll need to mark which users can approve or reject requests in the workflow.
- Next, set up workflow notifications to inform users about request statuses and actions in the workflow.
- Define the steps of the workflow, including the trigger, condition, response, and options. Then, create the workflow.
- Finally, test the workflow to ensure it works as expected and activate it for use.
Let’s look at each step in more detail.
Set Up Workflow Users and Approvers
In Business Central, search for Approval User Setup. All workflow users need to exist here first before you create the workflow. Click New to create new rows and add users by ID.
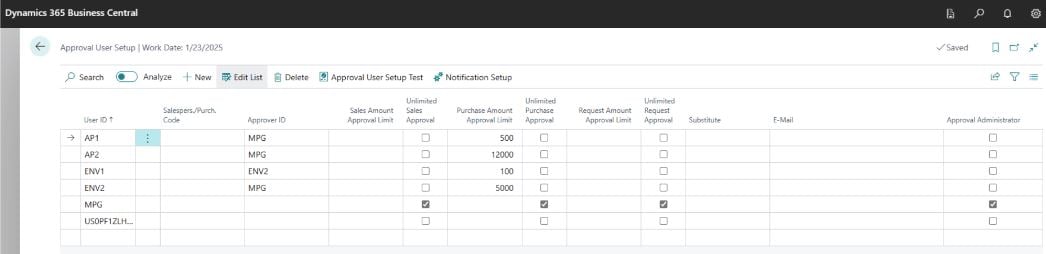
In the columns, define the approval levels and limits for each user. This includes a Substitute column which can delegate approvals to backup users if the approver is out. If you’re planning on using email notifications, you’ll also want to add each user’s email address.
One user will need to be designated as the Approval Administrator. You can find the checkbox in the far-right column. The Approval Administrator has all workflow rights and can supersede all other users.
Set Up Workflow Notifications
To set up notifications, search for Workflow Notification Setup. On that screen, you can define whether a notification email should be sent to alert the approver, or if a note should just be created in Business Central.
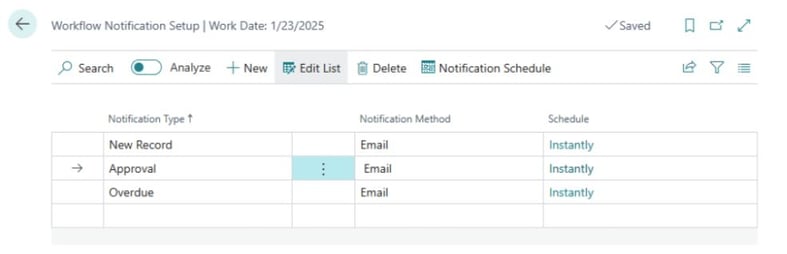
Notification emails can also be sent on a schedule to prevent an overflow of emails. For example, you can set overdue approval notifications to only be sent once a day at 8 a.m.
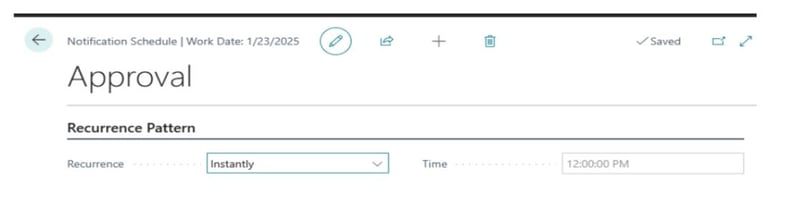
To set a notification schedule, just click the Notification Schedule button and set your preferred recurrence pattern.
You can also set up a sequence to determine when each user is notified. Go to Workflow User Group, find the user group you want to set a sequence for, and change where each user falls in the Slide sequence under the Sequence No. column.
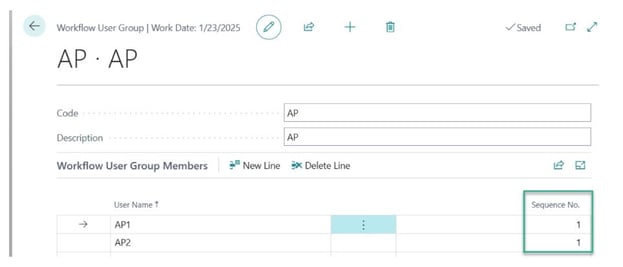
If workflow users have the same sequence number, they’ll get notified at the same time and can approve in any order.
Notification email template
By default, Business Central uses a template for notification emails based on Report 1320. You can choose to use that template, or you can customize the report by creating a new report layout.
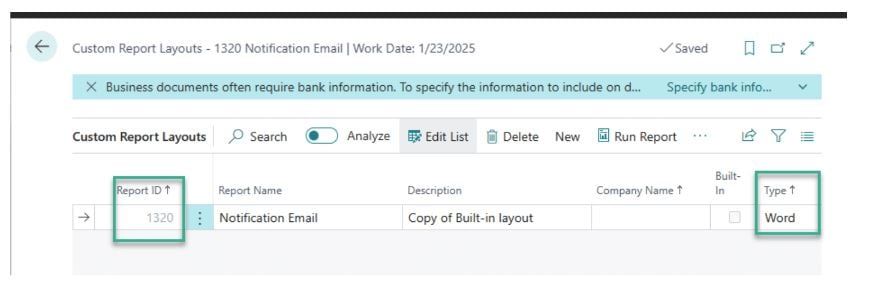
Export the copy of Report 1320, make your changes to the file in Word, and then add the new file to the report. You can learn more about custom report layouts on Microsoft Learn.
Creating a Workflow Based on a Template
While you can create a workflow from scratch, we recommend using one of the many templates that come with your Business Central solution. To start, go to Workflows and click New Workflow from Template.
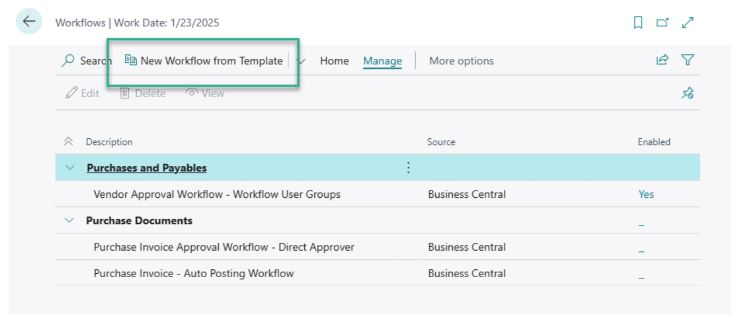
From there, choose the template that best fits your workflow.
Once the workflow card is created, update the description to match the purpose of the workflow. Then, scroll through the When Event, On Condition, and Then Response columns to customize the workflow to suit your business process needs.
For example, you could change the Condition so that it only applies to vendors who are cash customers. Under On Condition, you’d add a Payment Method filter for “Cash.” From there, you can modify the system’s Response as desired, whether it’s sending a notification email, moving the request to another level of approval, or another action.
When you’re ready to turn on the workflow, toggle the Enabled button.
Using Power Automate to Create Workflows
If your Business Central solution includes Power Automate, you can improve your efficiency even more by using it to create automated workflows between apps and services. Flow types include:
- Automated Flow: run by an event. For example, if a New Sales Order for Customer XYZ is created, it would trigger an automated flow.
- Approval Flow: an alternative to the Approval Workflows we just covered.
- Scheduled Flow: run at a scheduled date or time.
- Instant Flow: run on demand. For example, we could add a new flow button to the customer card which, when selected, automatically blocks a customer and sends an email with a statement attached.
We recommend using BC Approval Workflows for simple, more straightforward workflows that can be managed from within BC. But if you need more complex flows, Power Automate can do a lot, including:
- Providing more flexibility and customization options
- Integrating flows with other apps and services
- Allowing flows to be accessed and managed via mobile devices
- Enabling advanced conditional logic
- Creating flows with multi-step or parallel approvals
Learn More About Approval Workflows
If you’d like to see a demonstration of an Approval Workflow case or hear a Q&A on the topic, check out our recent webinar about approval workflows. And if you need further support, contact us today.