With the end of the year comes an assortment of critical accounting tasks. Microsoft Dynamics 365 Business Central makes these tasks easier, but you still need to know what you’re doing.
In this article, we’ll show you how to set up, export and import configuration packages. Then, we’ll cover how to set up your vendors for 1099 reporting and make sure their reportable amounts are updated.
Create and Set Up a Configuration Package in Business Central
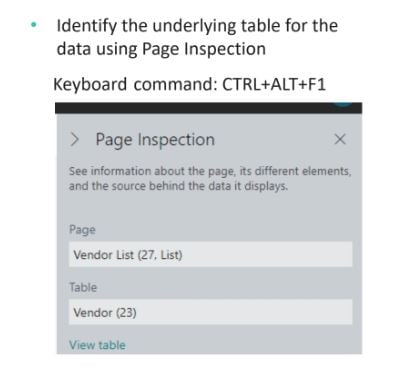
Configuration packages update items on a Table level, so the first step is to find the table that you need to update. In this example, we’ll identify the table by vendor.
Start by opening your Vendor list and then hitting CTRL+ALT+F1 on your keyboard to bring up Page inspection. Enter the vendor you’re creating a configuration package for to find the table.
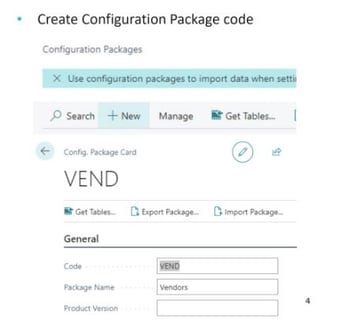
From there, go to your Configuration package card. Click the +New button to create a new code for the card. Make sure to choose a code name makes sense for the vendor.
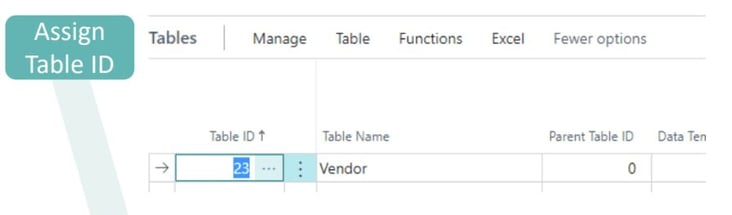
Next, you need to assign the table ID.
If the entire table is exported, you would need to include all of the details in the import. If you would only like to include specific information for the import and enter the rest of the details manually later, you can filter the table to certain fields.
To do this, go to Table -> Fields.
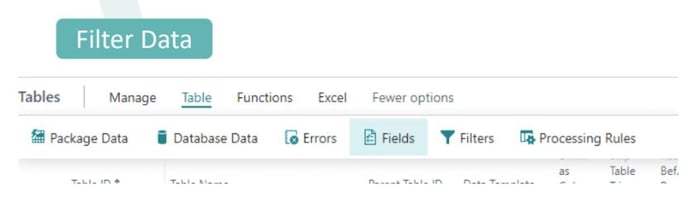
Then, select the fields from the list that you want to include or exclude. 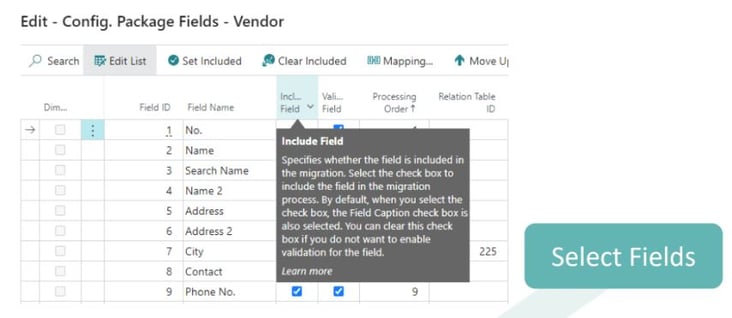
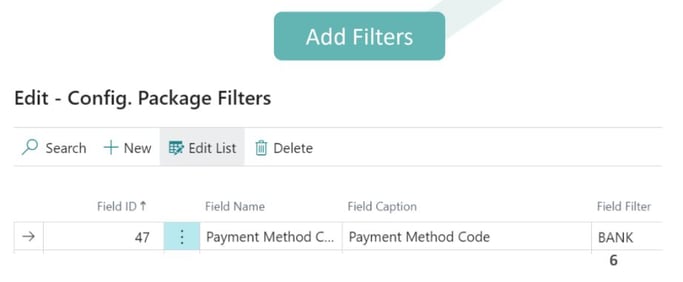
You can also filter this information. In this example, we filtered it by Payment Method Code, looking for all vendors with a bank value.
Export Configuration Package Data to Excel
When your configuration package has been created and set up, it’s time to export the data you’ve selected to Excel. To start, click the Excel menu item and then click Export to Excel.
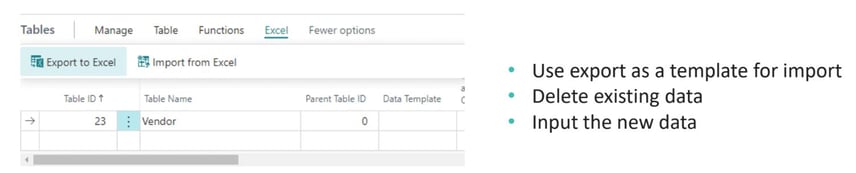
You can then use this export to create a template for your import. To do this, remove the existing data in Excel, except for the headers. Then, input the information you’d like to use.

Import Data from Excel, Validate and Apply
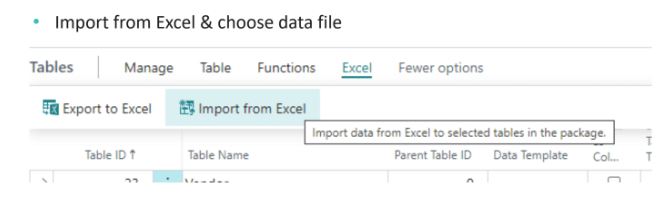
To import the data, go back to the Vendor configuration package you created. Under the Excel menu item, click Import from Excel. Select the Excel file with the new vendor information.
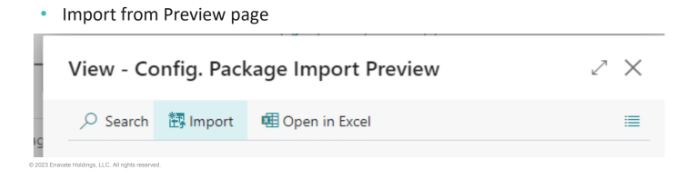
A Preview screen will appear. Click Import.
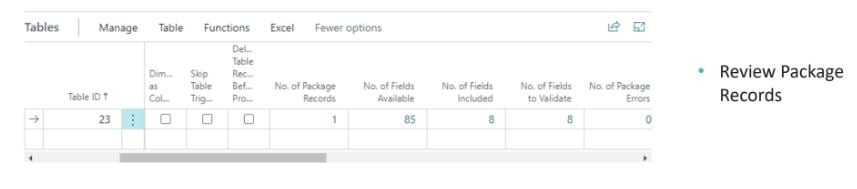
Review the package records that you want to import. In this example, there’s one package record with eight fields.
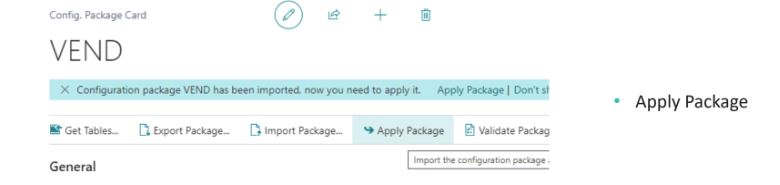
To fully import the information, click Apply Package.
Resolve Errors and Delete Data
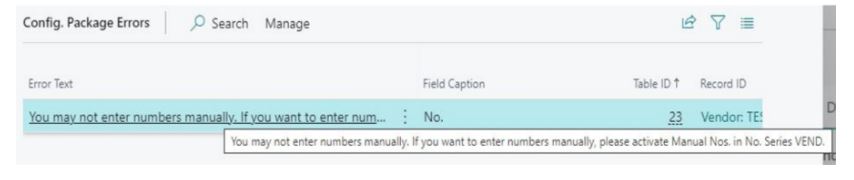
If any information in your configuration package doesn’t match what the system anticipates, or if it needs to be reviewed, an error message will appear, along with a red number indicating how many errors were detected.

Click the red number to review the specific errors. In this case, the vendor number series did not allow manual numbering because that option wasn’t enabled.
You can also use configuration packages to delete records. If you select Delete Table Records Before Processing, the program will delete all records in the table and reload only the records in the package. Before you export your information, remove the line that you would like to delete and then import everything else.

Set Up Vendors for 1099 Reporting in Business Central
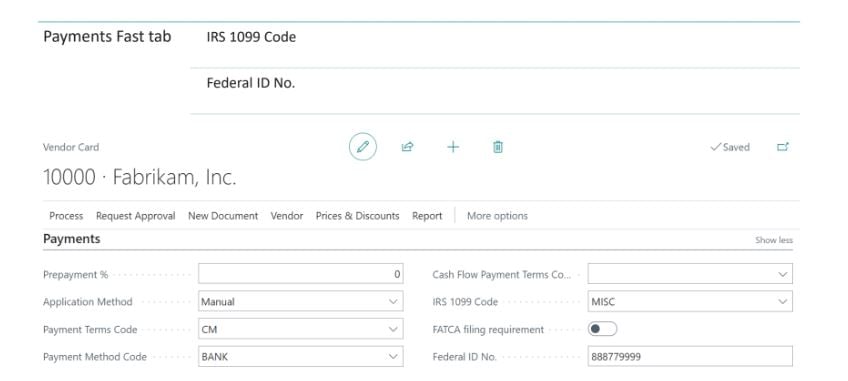
To set up a vendor that needs to receive a 1099, first go to the vendor, assign a 1099 code, and fill in the Federal ID number. If that value isn’t there, you’ll run into issues when you go for reporting.
Update a Vendor’s 1099 Reportable Amounts in Business Central
Let’s say you have some vendors that hadn’t been set up for 1099 reporting yet, but you do have some invoices that have been paid already.
Business Central calculates the 1099 amount based off of posted paid purchase invoices for the period you run it against. If the 1099 amounts are incorrect, you can correct them in one of two ways: directly through the vendor ledger entry, or through 1099 adjustments.
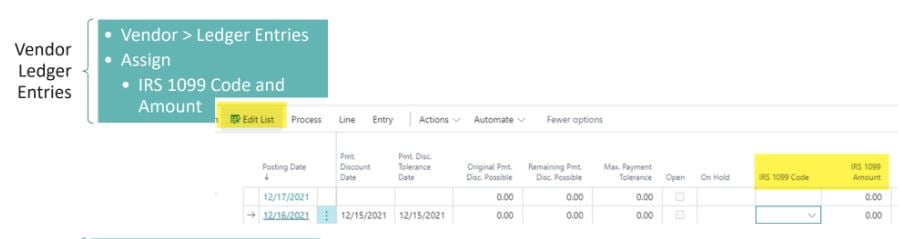
Vendor Ledger Entry
To correct an amount on the entry level, go to the Vendor Ledger Entry and click Edit List. You’ll see a field that says IRS 1099 Code and another that says IRS 1099 Amount. Add the code you’ve already set up for the vendor to the first field, and then add the amount you want to report for this invoice to the second field. Keep in mind that this is for paid invoices only.
1099 Adjustments
If you have a total amount that the vendor needs to report, go to 1099 Adjustment from the form boxes page. Define your Vendor, the Year you want to report this amount to, and then the Amount.
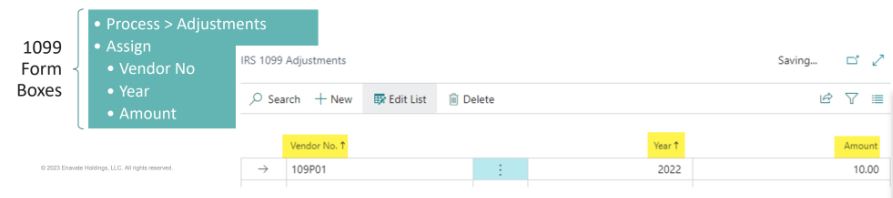
If you needed to, for example, increase the existing amount by $10, you would need to add positive $10. If you needed to decrease it by $10, you would include a negative sign indicator under the Amount field.
Update and Print Tax Forms in Business Central
Before you print these reports, you’ll need to first update them. To align with the most recent forms from the IRS, go to 1099 Form Boxes and click Update Form Boxes.
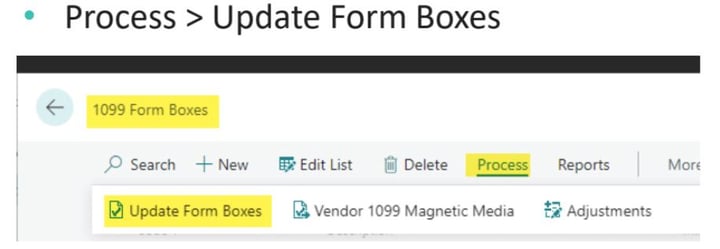
If updates are needed, BC will perform the updates and you’ll get a popup indicating as much.
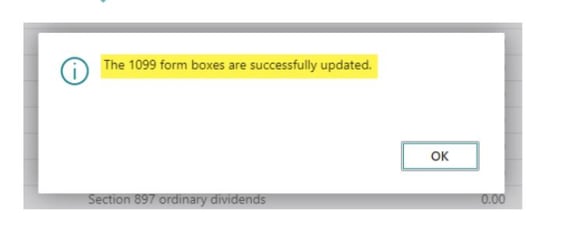
If no pop-ups appear, you’re good to go.
When your forms have been updated, you can run the 1099 report one of two ways. You can run it from the Vendor Card by selecting Reports and running whichever option you have set up on the card.
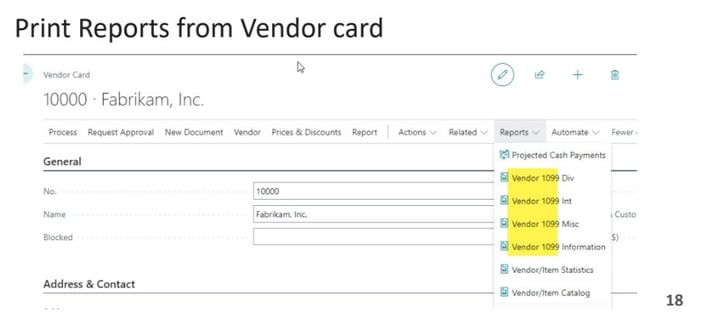
The other option is to run the report from the 1099 form boxes page that you were already on. Go to Reports and choose the option you’d like to use.
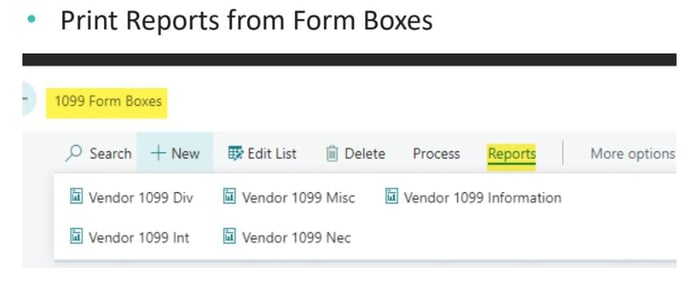
You can filter the report on a vendor level or just print it for all of your vendors at once.
You will need to define your Calendar Year and then add the Vendor Number. Then, click Print.
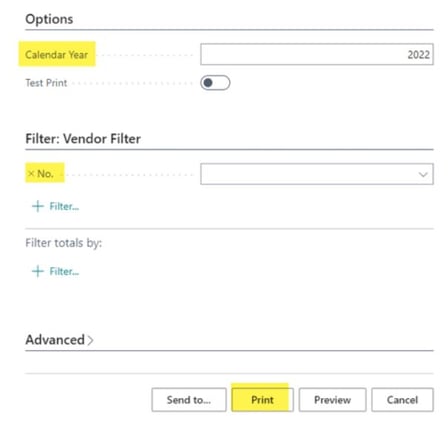
NOTE: Always print directly to the printer using the Print option. Do not use the “Send To” option, as it can skew the layout and make it difficult to align with the form boxes.
Export Tax File for Electronic Upload
Due to a recent IRS change, if there are more than 10 vendors needing to be filed, you must file electronically. There are some third-party extensions that can handle this for you. However, there is a solution already available on Business Central called Vendor 1099 Magnetic Media.
If you search for that value in BC, you’ll get this report options page:
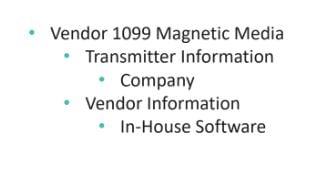
Because you’re not using a third party, the Transmitter Information should already be there.
The Vendor Information page will be pre-filled with your company information, but you’ll need to add the appropriate contact info.

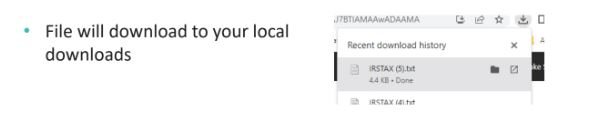
When you have the forms filled out, click OK. The file will download to your local downloads.
Review the file and check that each B entry has a Federal ID number and the correct amount per vendor.
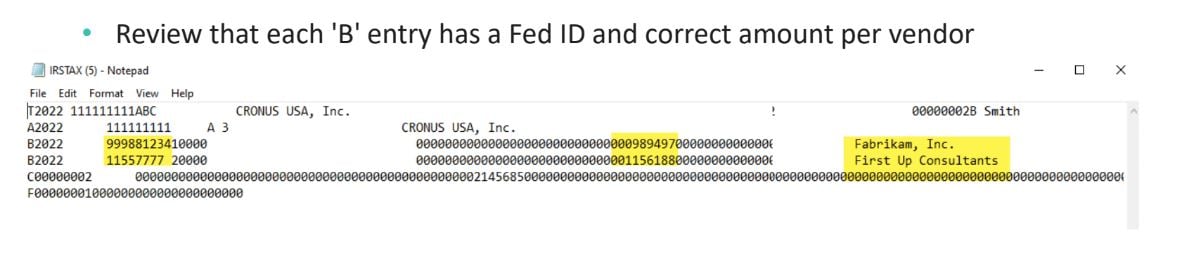
If the Federal ID number is blank, you’ll run into an issue when you upload the file on the IRS site.
Enavate is Here to Help
If you’d like to see a demonstration of these tasks or hear a related Q&A, check out our recent webinar. And if you need more support in Microsoft Dynamics 365 Business Central, open a support request with our expert team.